A pots and pans cabinet rarely fails because it's too small. It fails because everything is stacked flat, the lids have nowhere to live, and the pan you use every single day is trapped under the one you use twice a year. Change those three things and even a tiny corner cabinet starts behaving.
The good news is that none of this needs a renovation. Most of the fixes cost less than a nice candle, and many of them don't need a single screw, which matters if you rent or simply don't trust yourself with a drill (no judgment, I'm in that club too).
This guide covers how to organize pots and pans in small cabinets, lids included: how to edit what you own, where each piece should live, 8 storage solutions you can mix and match, a cabinet-by-cabinet table with rough costs, renter-friendly options and a quick weekly reset that keeps the avalanche from coming back.
Why Pots and Pans Turn Into an Avalanche
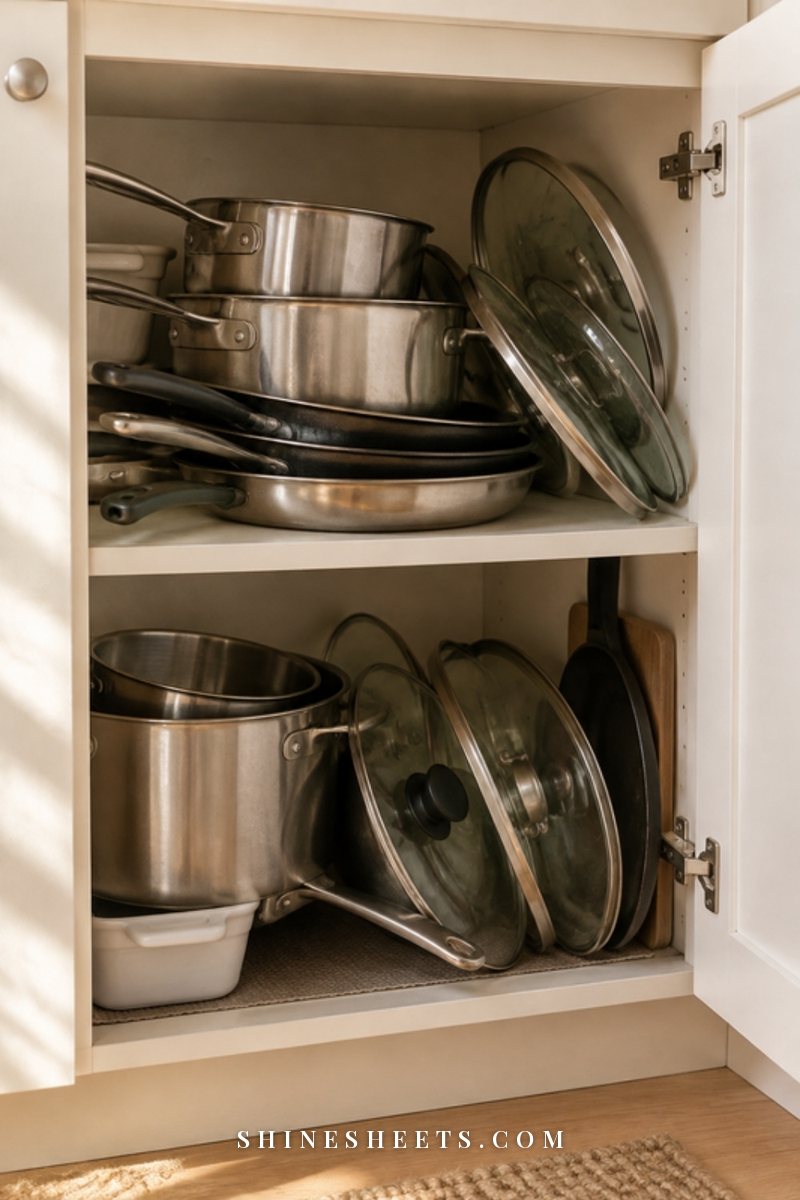
Before buying anything, it helps to understand why this one cabinet gets chaotic faster than any other spot in the kitchen. Pots and pans are awkward in a very specific way: they're heavy, they come in different diameters, they have long handles that stick out, and their lids are round, slippery and never stack.
When you store them all flat, in one pile, a few things happen:
- Gravity wins. The pan at the bottom of a stack of five is effectively gone. Getting it out means lifting four others, so you stop using it, or you start leaving it on the stove permanently.
- Lids float. With no assigned home, lids drift into every gap and slide out when you open the door.
- Handles fight. Long handles point in all directions and block the pans behind them.
- Back corners die. Deep cabinets have a dark back half that you can't see or reach, so things go in there and never come out.
Every solution below solves one of those four problems. Keep that in mind when you choose: you don't need all eight, you need the two or three that match the problem your cabinet actually has.
Step 1: Empty the Cabinet and Edit Honestly
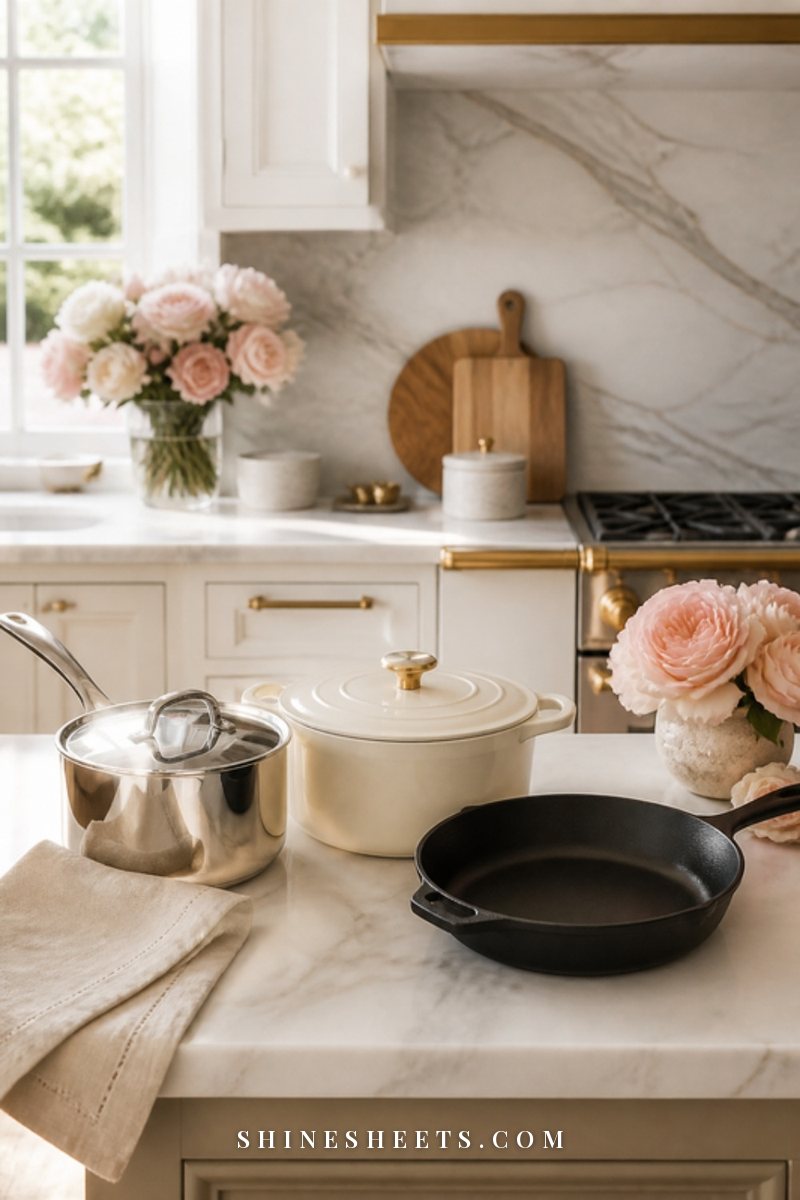
Yes, everything comes out. It takes about 15 minutes, and it's the step that makes the rest work. Lay it all on the counter or a towel on the floor, grouped by type: frying pans, saucepans, stockpots, baking dishes, lids.
While the cabinet is empty, give it a quick wipe. If the shelf is sticky or greasy (pans love to leave a ring), my guide on how to clean greasy kitchen cabinets without ruining the finish has the gentle method. Let it dry fully before anything goes back in.
Now edit, honestly and quickly. For each piece, ask yourself one question: have I cooked with this in the last six months?
- Yes, weekly: it stays, and it gets the best spot.
- Yes, a few times: it stays, in a slightly less prime spot.
- Only for one occasion a year: it can live higher up, in the oven drawer, or in a closet shelf outside the kitchen.
- No, and it's scratched, warped or peeling: let it go. A nonstick pan with a flaking coating isn't worth the cabinet space.
Watch for duplicates. Many kitchens have three medium frying pans and no clear reason why. Keep the best one or two, and from now on use a simple one-in-one-out rule: a new pan comes in, the weakest one of the same size leaves.
Finally, match every lid to a pot. Lids without a partner can go (unless one fits several pans, in which case it's a keeper). This alone usually clears out a surprising amount of clutter.
Store by Frequency, Heaviest Low
Once you know what's staying, decide where each piece goes using two simple rules.
Rule one: frequency. The pans you use most live in the front, at waist-to-knee height, closest to the stove. If you make eggs every morning, that frying pan should come out in one move, without lifting anything else.
Rule two: weight. The heaviest pieces (cast iron, the big stockpot, a Dutch oven) live as low as possible. Lifting a heavy pot down from above your head is how wrists get sore and shelves get dented. Bottom shelf or floor of the cabinet, always.
A quick zoning plan that works in most small kitchens:
- Front, lower shelf: your two or three daily pans.
- Back, lower shelf or floor: heavy pots and the stockpot.
- Upper shelf or riser: lighter, less-used pans and baking dishes.
- Door or side wall: lids.
That's it. Four zones. If your cabinet is a single shelf, you're simply working with "front" and "back."
Cabinet by Cabinet: Which Solution Fits Your Space
Not every cabinet needs the same fix. Find your cabinet type in the table below, then jump to the matching solution in the next section. Costs are rough ranges for basic versions; prices vary a lot by size and material.
| Cabinet type | Best solution | Approx. cost | Renter-friendly? |
|---|---|---|---|
| Standard lower cabinet (one shelf) | Vertical pan rack + door lid holder | $20–45 | Yes (freestanding rack, adhesive lid holder) |
| Deep lower cabinet | Pull-out organizer | $30–80 | Yes, if you choose a no-screw sliding basket |
| Narrow cabinet (under 12 inches) | Tension rod dividers for lids and baking sheets | $10–25 | Yes |
| Tall cabinet with wasted height | Shelf riser | $15–30 | Yes |
| Corner cabinet | Nesting by size with pan protectors, daily pans at the front | $8–15 | Yes |
| Drawer base (deep drawers) | Pans standing on edge with a vertical rack, lids in a lid organizer | $20–40 | Yes |
| No cabinet to spare | Hanging rail on the wall or under a shelf | $20–50 | Only with a freestanding or tension-mounted rail; most need screws |
| Oven with a storage drawer | Oven drawer for flat baking pans and one or two skillets | $0 | Yes |
Screenshot it if you like, then pick no more than two solutions to start. You can always add a third once you see how the cabinet behaves.
8 Storage Solutions for Pots, Pans and Lids
Here are the eight ideas, from the one that helps almost everyone to the clever spots people forget. Measure your cabinet's width, depth and height (including the door opening, which is often narrower than the inside) before ordering anything.
1. A Vertical Pan Rack
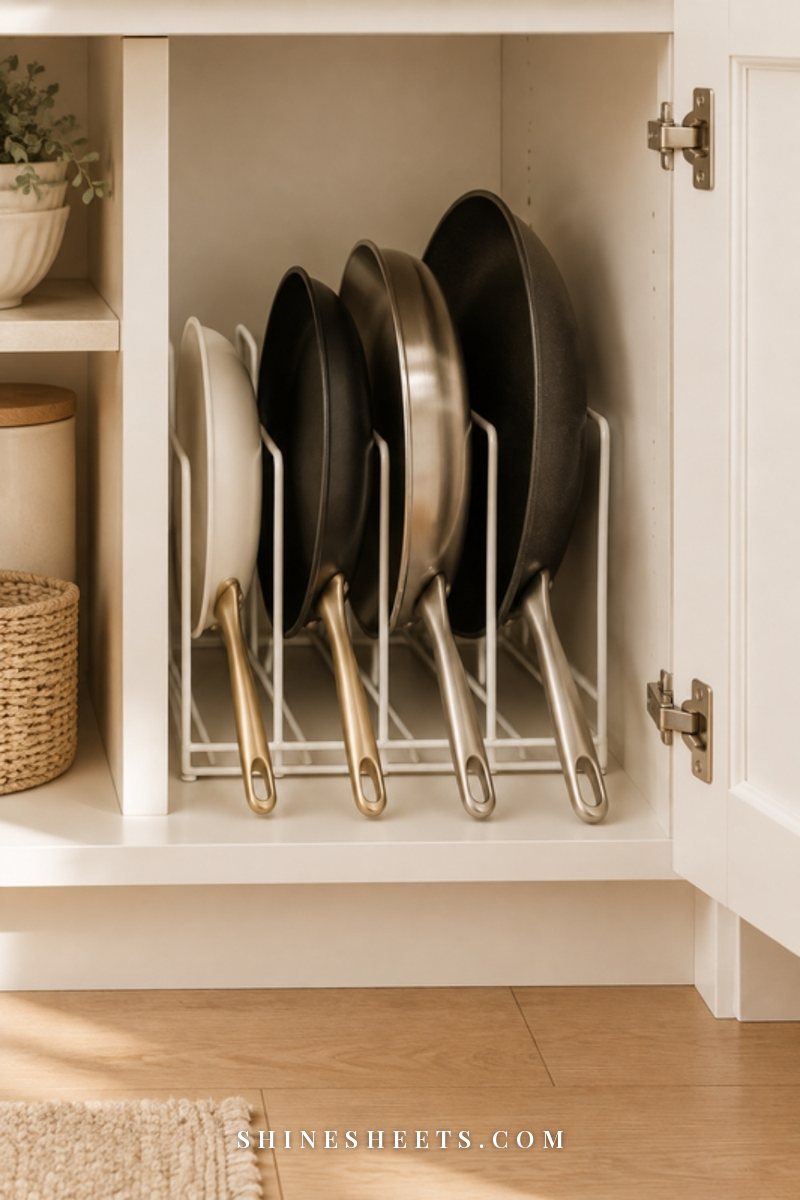
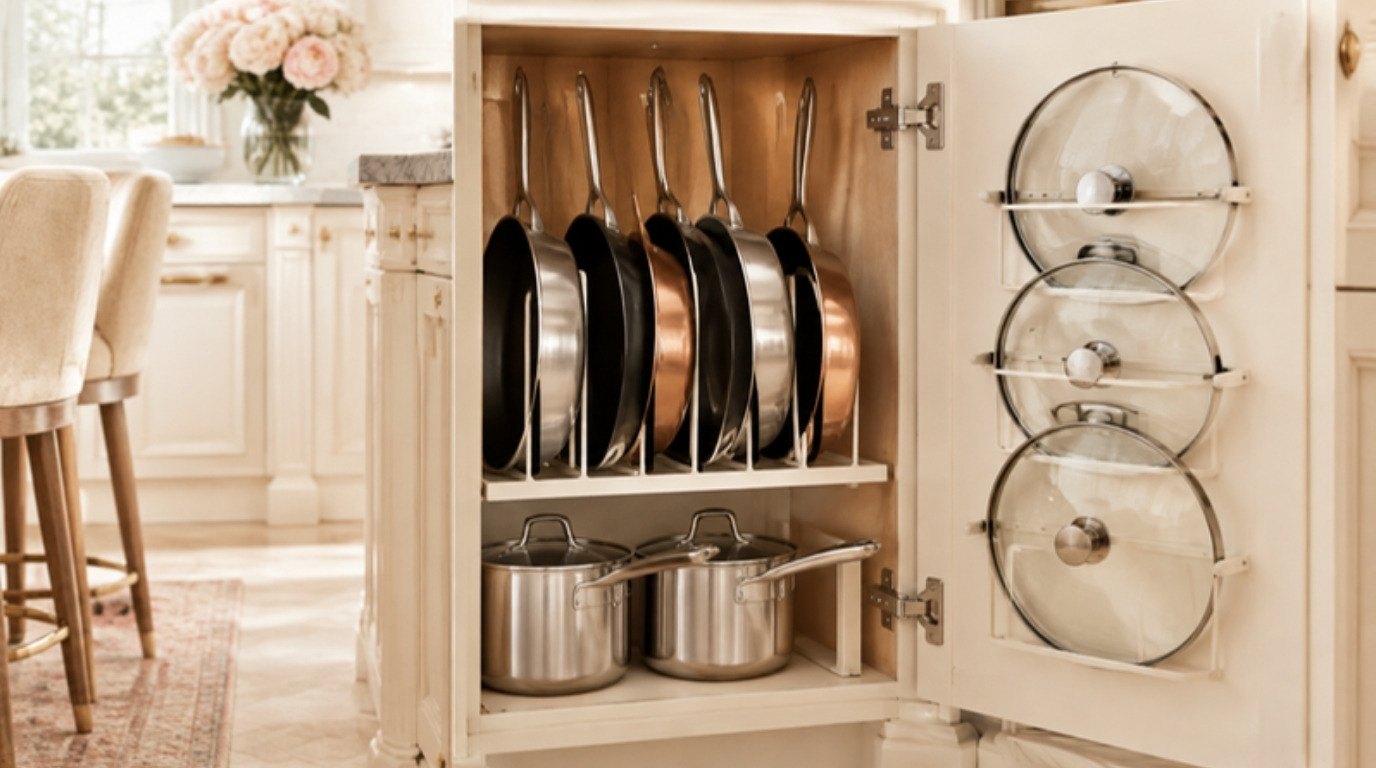
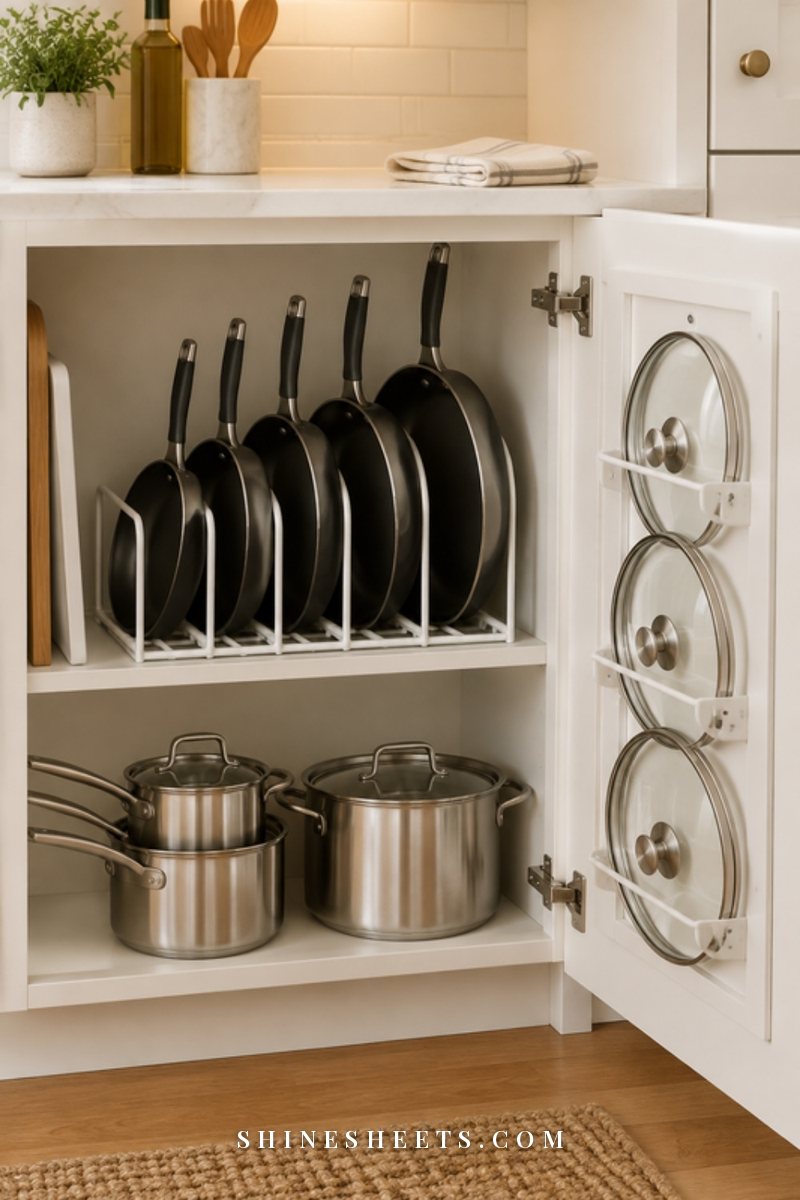
If you only do one thing, do this. A vertical rack lets you file pans on their edge, like folders in a drawer, so every single one slides out without disturbing the others. It solves the "gravity wins" problem completely.
Look for a rack with adjustable dividers, so you can fit a thin crepe pan next to a deep skillet. Heavy-gauge metal or a weighted base matters more than looks, because cheap racks tip over once you add two heavy pans. A sturdy white vertical pan rack is a pick for standard lower cabinets and deep drawers alike.
Two tips: put the rack so the handles face you (you'll grab them by the handle, not the rim), and keep the heaviest pan in the slot closest to the side wall, where the rack is most stable.
2. A Pull-Out Organizer
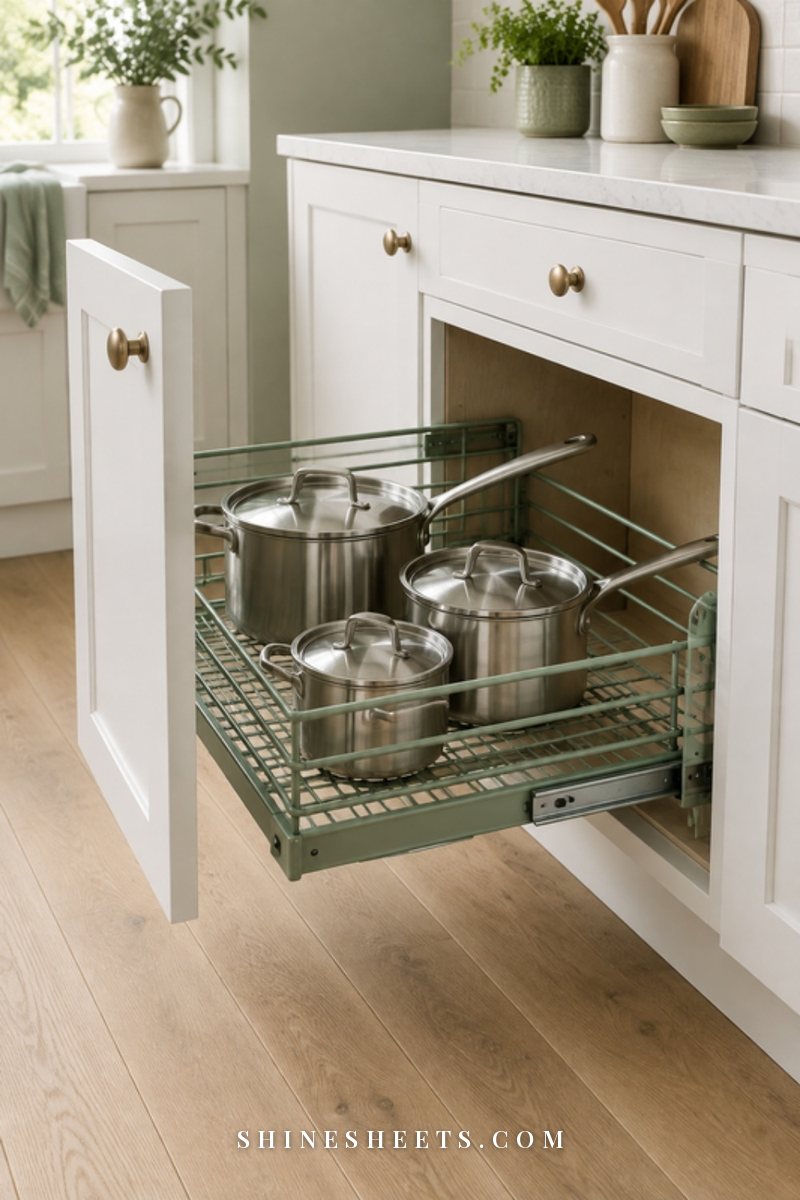
Deep cabinets have a dead zone at the back. A pull-out organizer brings that back half to you. Instead of kneeling on the floor with a flashlight, you slide the basket out and see everything at once.
There are two kinds: ones that screw into the cabinet floor (smoother and stronger) and freestanding sliding baskets that just sit on the shelf (the renter-friendly option). For most small kitchens, a freestanding sage pull-out basket is enough for saucepans and lighter pots. Check the weight rating if you plan to put a stockpot in it.
Measure the door opening and any hinges carefully. Hinges are the number one reason pull-outs don't fit, so subtract about an inch from the inside width to be safe.
3. A Lid Holder on the Cabinet Door
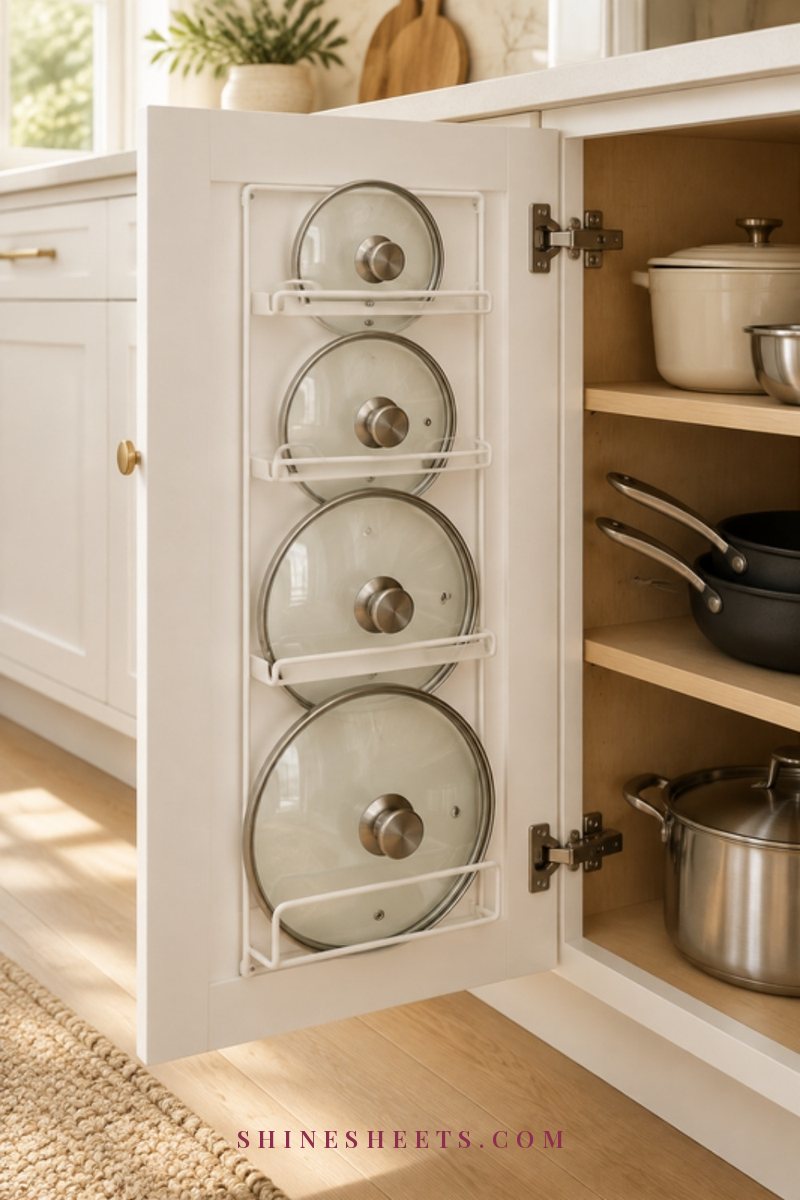
Lids are the true troublemakers, and the inside of the cabinet door is the most overlooked space in the kitchen. A door-mounted lid holder keeps them flat against the door, visible and reachable.
You can use adhesive lid holders (small hooks or rails that stick on), an over-the-door rack, or a freestanding adjustable lid organizer that sits upright inside the cabinet if your door is too shallow. Before mounting anything, close the door slowly with the lids in place to make sure they clear the shelf and the pans behind them.
Group lids by size, smallest at the top. And if you're mounting on the door, keep the total weight modest: glass lids add up quickly, and adhesive strips have a limit (always check the weight rating on the package).
4. Nesting by Size With Pan Protectors
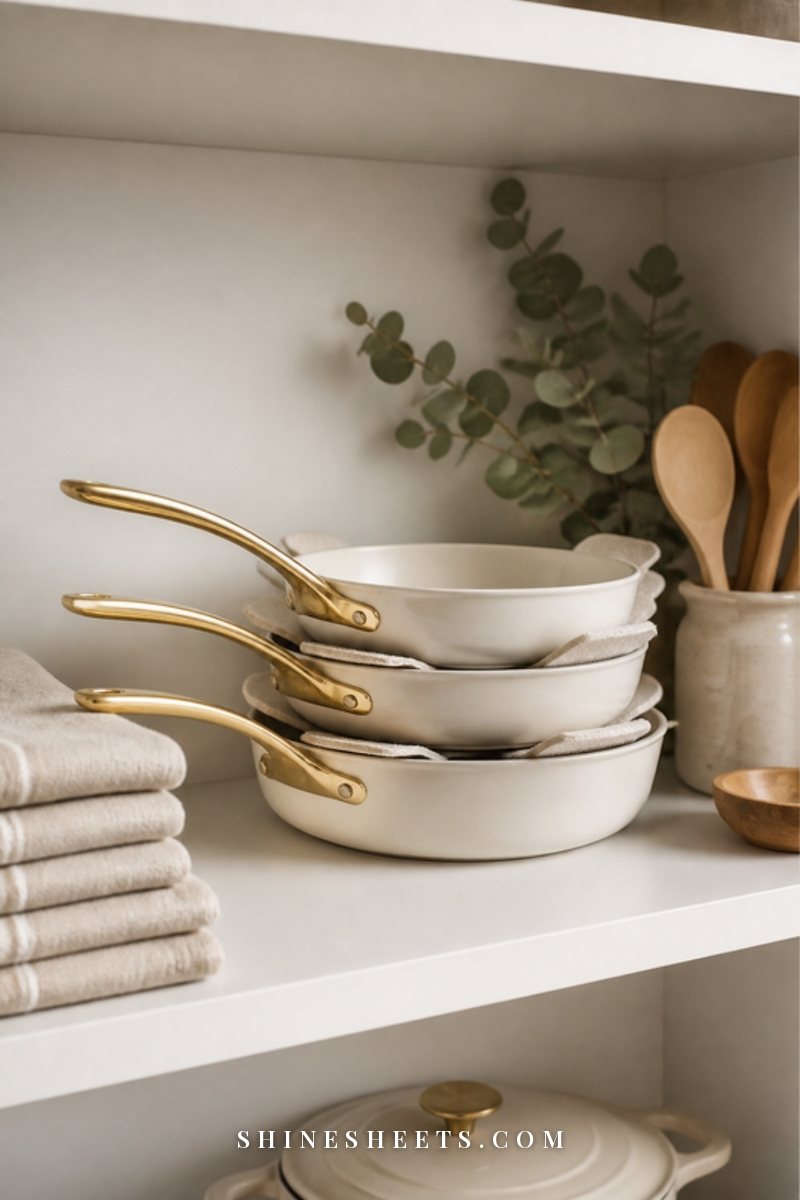
Sometimes stacking is the right answer, especially in a corner cabinet where racks don't fit. The trick is stacking with intention: biggest at the bottom, smallest on top, and only pans of the same shape nested together (frying pans with frying pans, saucepans with saucepans).
Put a protector between every pan. Felt or soft quilted pan protectors stop metal from scratching nonstick coatings, which is the main reason nonstick pans wear out early. A set of cream felt pan protectors is an inexpensive pick, and they wash easily. A folded tea towel works in a pinch.
Keep stacks short: three pans, four at most. If you need to lift more than two pans to reach the one you want, that stack is too tall, and it's time to move one pan somewhere else.
5. A Shelf Riser
Most lower cabinets have one shelf and a lot of empty air above every stack. A shelf riser turns that air into a second level, so you get two short, easy stacks instead of one tall, wobbly one.
Look for an expandable shelf riser that adjusts in width and has solid legs. Metal risers handle pans better than thin plastic ones. Put lighter pans and baking dishes on top, and slide flat items like sheet pans or a griddle underneath.
One honest warning: a riser works best for medium-weight pieces. Keep cast iron on the cabinet floor.
6. Tension Rod Dividers
This is the budget hero of cabinet organization. Two or three small tension rods, placed vertically between the shelf and the top of the cabinet (or horizontally between the side walls), create instant slots for lids, sheet pans, cutting boards and shallow skillets.
A simple set of small white tension rods costs very little and leaves no marks when you move out. Space them about 2 to 3 inches apart for lids, wider for baking sheets. Twist them firmly and test with a gentle push before loading anything.
Narrow cabinets next to the oven are the perfect spot for this. Things that were impossible to store flat suddenly stand up like books.
7. A Hanging Rail
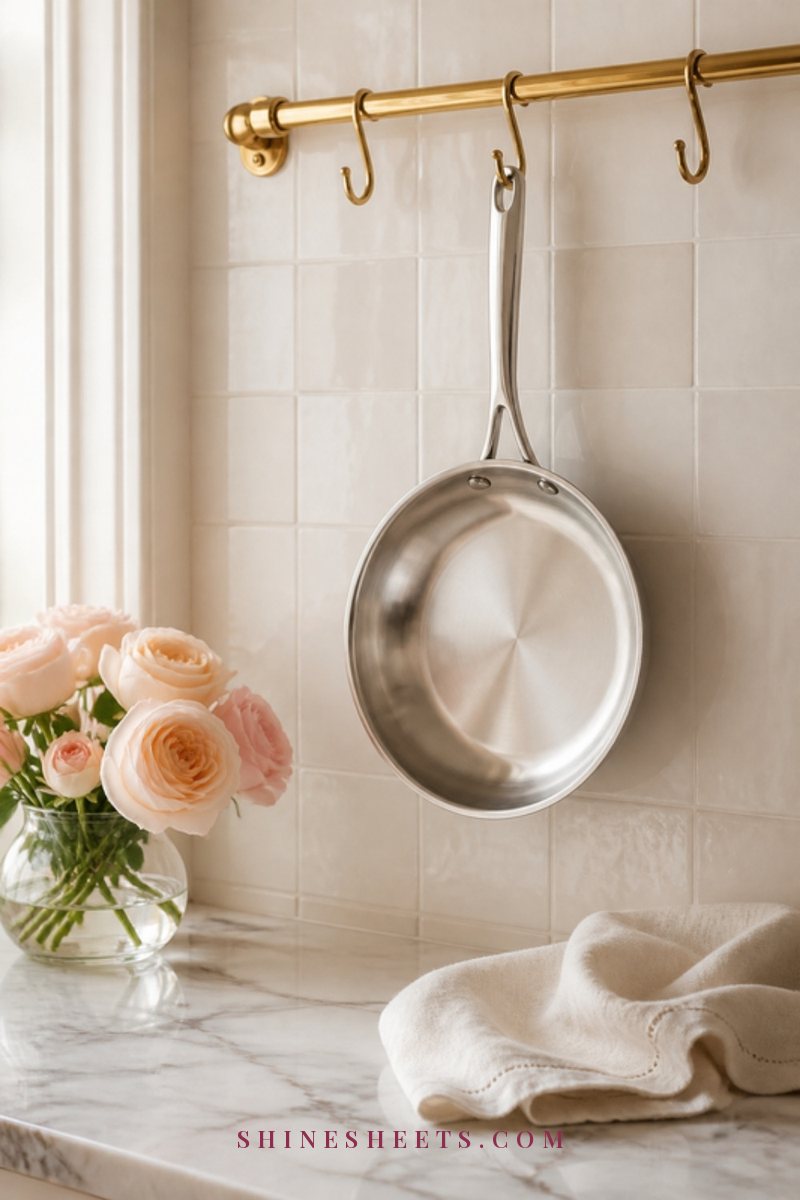
If your cabinets are full no matter what, take some cookware out of them entirely. A rail with S-hooks, mounted on the wall near the stove or under a shelf, holds your daily pans in plain sight. It looks lovely with a few matching pieces and gives a small kitchen a cafe-like feel.
A slim rail with gold S-hooks is a pretty pick, but be realistic about weight. Most rails need screws into a stud for heavy pans. Adhesive rails are fine for a small saucepan or utensils, not for cast iron. If you rent, look for a freestanding pot rack or a rail that hangs from an existing open shelf instead of the wall.
Only hang pans you use often. Anything that sits on a hook for months collects kitchen grease and dust.
8. The Oven Drawer
Many ovens have a drawer at the bottom. Sometimes it's a warming drawer (check your oven's manual, because a warming drawer heats up and shouldn't hold plastic or anything with silicone handles), but often it's simply a storage drawer, and it's the most forgotten storage spot in the kitchen.
It's perfect for flat things: sheet pans, a roasting pan, a griddle and one or two skillets. Remove everything before you preheat if you're unsure whether it gets warm, and never store anything flammable there, like paper towels, oven mitts or wooden boards.
If your stove has no drawer, the same idea applies to the top of the fridge or a high cabinet: one spot for the occasional pieces, out of the way of the daily ones.
Renter-Friendly Options (No Drilling Needed)
You can build a fully organized pots and pans setup without touching a screwdriver. Here's what works well in rentals:
- Freestanding racks and risers. Vertical pan racks, shelf risers and sliding baskets all just sit inside the cabinet. They move out with you.
- Tension rods. No holes, no marks, and you can rearrange them in seconds.
- Adhesive hooks and lid holders. Use removable strips rated for the weight, and press firmly for 30 seconds. Wait the time on the package (usually an hour) before hanging anything.
- Over-the-door racks. They hook over the cabinet door, but check that the door still closes fully.
- A freestanding pot rack or bakers rack. If wall space is the issue, a small standing rack can hold your daily pans next to the stove.
Removing adhesive strips? Pull the tab slowly, straight down and parallel to the surface, never outward. That's what keeps the paint or finish intact. For more ideas that won't upset your landlord, my list of renter-friendly kitchen upgrades covers the rest of the room.
How To Protect Your Cookware in Storage
Good organization isn't only about space. It's also about keeping your pans in good shape, so you buy fewer of them. A few material-specific habits:
- Nonstick: never stack bare. Felt protectors or a towel between every pan, and store vertically whenever you can.
- Cast iron: make sure it's completely dry before storing (moisture means rust). A paper towel inside the pan absorbs any humidity. Store it low and alone, or on top of a stack, never under other pans.
- Stainless steel: the toughest of the bunch. It can nest without protectors, though a liner keeps it from clanging.
- Enameled pots: chips easily at the rim. Store with the lid upside down on top, or with a protector between the lid and pot.
- Glass lids: keep them upright in a lid holder or rack rather than stacked, so they don't knock into each other.
And always let pans cool and dry before putting them away. A warm, damp pan in a closed cabinet is how cabinets get water rings and musty smells.
How To Keep It Tidy: A 5-Minute Weekly Reset
Every organized cabinet slowly drifts back toward chaos. That's not a personal failure, it's just what happens when a cabinet gets opened three times a day. A tiny weekly reset keeps it from ever getting bad again.
Once a week (I like tying it to a regular chore, like the night you take out the recycling), do this:
- Return strays (1 minute). Any pan living on the stove, in the dish rack or in the oven goes back to its slot.
- Match lids (1 minute). Lids back on the door holder or in their slots, smallest to largest.
- Wipe the shelf (1 minute). A quick pass with a damp cloth catches crumbs and drips before they become sticky rings.
- Check protectors (1 minute). Felt protectors back between the nonstick pans. Toss any that are greasy into the laundry.
- Notice what didn't move (1 minute). If a pan sat untouched all month, move it to a higher shelf or the oven drawer, and give the space to something you actually use.
Five minutes, done. If the rest of your kitchen could use the same calm, my kitchen organization ideas for small kitchens go beyond the cookware cabinet, and if your baking dishes or food storage overflow into this space, organizing your pantry often frees up exactly the shelf you need. Don't forget the other low cabinet either: under-sink organization uses many of the same racks and risers.
Common Mistakes To Skip
A few habits that make pots and pans cabinets harder than they need to be:
- Buying organizers before editing. You'll organize pans you don't need and buy racks that don't fit.
- Forgetting to measure the door opening. The inside of a cabinet is often wider than the frame you have to fit things through.
- Storing heavy pots high. It's uncomfortable and it isn't safe. Heavy goes low, always.
- Keeping every lid "just in case." If it doesn't fit anything you own, it's not useful, it's just in the way.
- Overloading adhesive hooks. If a hook is rated for 3 pounds, a cast iron skillet will win, and usually at 2 a.m.
- Putting pans away wet. It invites rust and musty smells, and it damages cabinet shelves over time.
Final Thoughts
An organized pots and pans cabinet isn't about a perfect, photo-ready shelf. It's about opening the door and grabbing the pan you need in one easy move, without anything sliding out or clanging onto the floor.
Start small: empty, edit, then add one or two solutions that match your cabinet. Give them a week, notice what still bugs you, and adjust from there. Your future self, the one making dinner on a tired weeknight, is going to feel so much lighter opening that door.