Cleaning supplies don't get messy because you're messy. They get messy because most of us buy them one emergency at a time, shove them wherever there's a gap, and never decide where anything actually belongs. The result is a cabinet full of half-empty bottles, three of the same glass cleaner, and no idea where the good sponges went.
The fix is surprisingly simple: fewer products, clear safety rules, and a home (a "zone") for every supply, as close as possible to the place you use it. Once that's in place, cleaning gets faster almost by accident, because you stop searching and start grabbing.
This guide walks you through how to organize cleaning supplies step by step: how to declutter what you have, the safety basics that matter more than any pretty bin, zone-by-zone ideas for under the kitchen sink, a cleaning caddy, the laundry room, the bathroom and a closet for mops and brooms, plus small apartment solutions, smart refills and a zone map table you can copy for your own home.
It took me far too long to realize that I didn't need more storage. I needed fewer bottles and a better plan for the ones I kept.
Why Cleaning Supplies Get Messy So Fast
Before you buy a single organizer, it helps to know why the chaos keeps coming back. In most homes, it's one (or all) of these:
- Too many single-purpose products. A spray for the stovetop, another for the microwave, another for the fridge. Most of them do the same job.
- No fixed home. If a bottle can live "anywhere," it ends up everywhere: on the washing machine, behind the toilet, under the bathroom sink and in the hall closet all at once.
- Deep, dark cabinets. The back of an under-sink cabinet is where products go to be forgotten. You can't use what you can't see.
- Buying before checking. When you can't see what you already own, you buy another one "just in case."
- Storage that's far from the mess. If the toilet brush lives in the bathroom but the toilet cleaner lives in the kitchen, the toilet gets cleaned less often. That's just human.
Every step below solves one of these problems. None of them require a big budget or a weekend project.
Step 1: Declutter Before You Organize
Organizing clutter just gives you neatly stored clutter. Set aside 30–45 minutes, put on something to listen to, and pull every cleaning product in your home into one spot. Yes, every one, including the random bottle in the car trunk and the stain spray hiding in the laundry basket. Put an old towel down first, because some bottles will be sticky.
Now sort everything into four piles:
- Keep: products you've used in the last few months and genuinely like.
- Combine: duplicates of the exact same product. Pour two half-bottles of the same dish soap into one (never mix different products, even if they seem similar).
- Use up: things you don't love but will finish. Put them in front so they get used first.
- Let go: dried-out, separated or crusty products, things with missing labels, products that irritated your skin, and anything you bought for one specific job that's long gone.
A quick word on letting go: please don't pour old cleaning products down the drain all at once or mix leftovers together to "get rid of them faster." Many household cleaners can be used up normally or disposed of according to the label, and stronger products like oven cleaners, drain openers and pesticides often belong at a household hazardous waste drop-off. Your city or county website usually lists the nearest one and the collection days.
A good rule of thumb once you're done: one all-purpose cleaner, one glass cleaner, one bathroom cleaner, one disinfectant you trust, dish soap, and a scouring powder or cream cleanser will cover almost everything. Specialty products (wood polish, stainless steel spray, carpet spot remover) are fine if you actually use them. If you want simpler options, my guide to natural cleaning swaps that actually work shows which basics can do double duty.
Step 2: Set Up Safe Storage Rules
This part isn't glamorous, but it matters more than any matching bottle. Cleaning products are chemicals, and a calm system is also a safe one. Here are the rules I'd build everything else around:
- Keep bleach away from ammonia and acids. Never mix bleach with ammonia (found in some glass cleaners) or with vinegar and other acidic cleaners, because the combination releases harmful gases. Store bleach products on a separate shelf or in a separate bin so they can't be grabbed together by mistake.
- Keep everything in its original container unless you're decanting a simple, mild product into a clearly labeled bottle (more on that below). The original label has the instructions, warnings and first aid information.
- Up high or locked if kids or pets live with you or visit. A child safety latch on the under-sink cabinet costs very little and takes five minutes to install. Strong products like drain cleaner and oven cleaner belong on a high shelf, not at floor level.
- Caps closed, nozzles turned to "off." Leaky bottles are how cabinet bases get damaged and how pets lick something they shouldn't.
- Away from heat and food. Don't store cleaners next to the stove, above the oven, or on the same shelf as food, snacks or pet food.
- Good airflow. Avoid sealing strong-smelling products in a tiny airtight box in a hot room.
If anything ever gets swallowed, splashed in an eye or mixed by accident, call your local poison control center right away and keep the product bottle with you so you can read the label to them. It's one more reason to keep original containers.
Step 3: Give Every Supply a Zone
A zone is simply the spot where a group of supplies lives, as close as possible to where you use them. Instead of one giant cleaning cabinet, think in small stations: the kitchen sink, the bathroom, the laundry area, and a "tall tools" spot for mops and the vacuum. A portable caddy fills in the gaps.
Duplicating a few cheap basics (an extra all-purpose spray and a microfiber cloth in the bathroom, for example) is one of the easiest ways to make cleaning feel lighter. You'll wipe the sink in two minutes because the spray is right there.
Under the Kitchen Sink
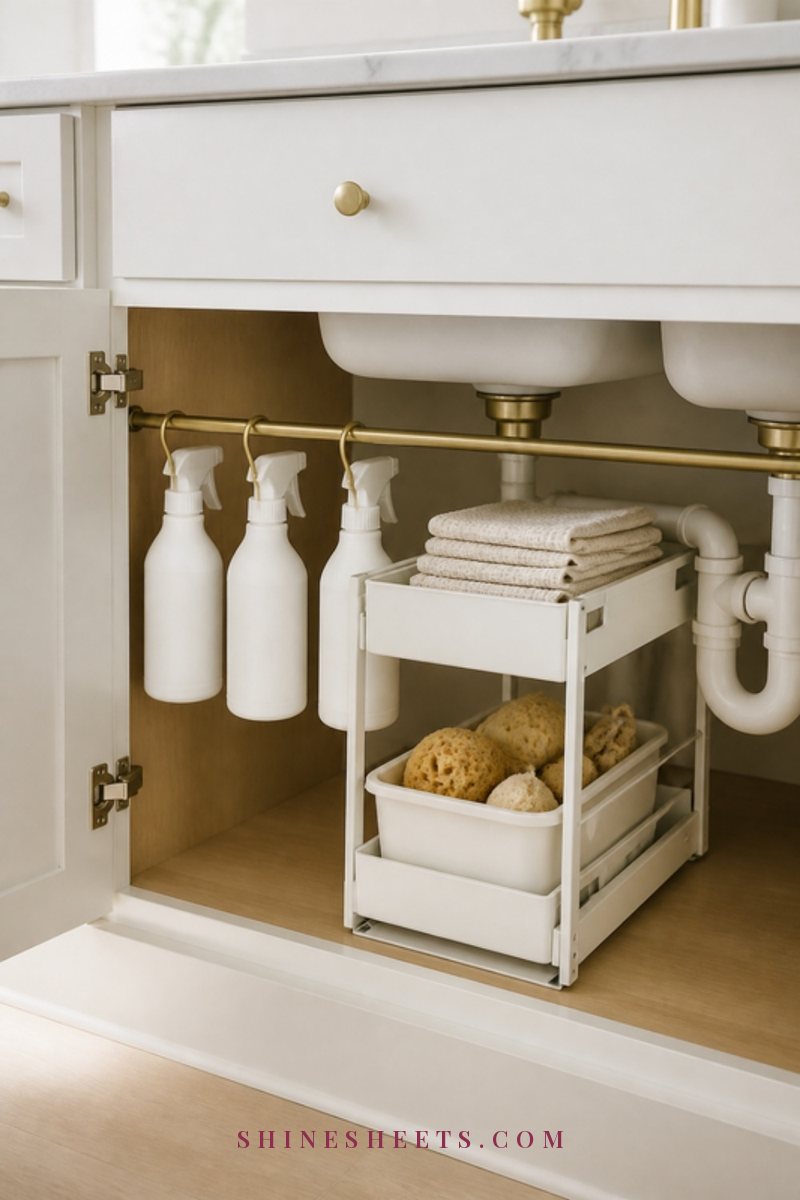
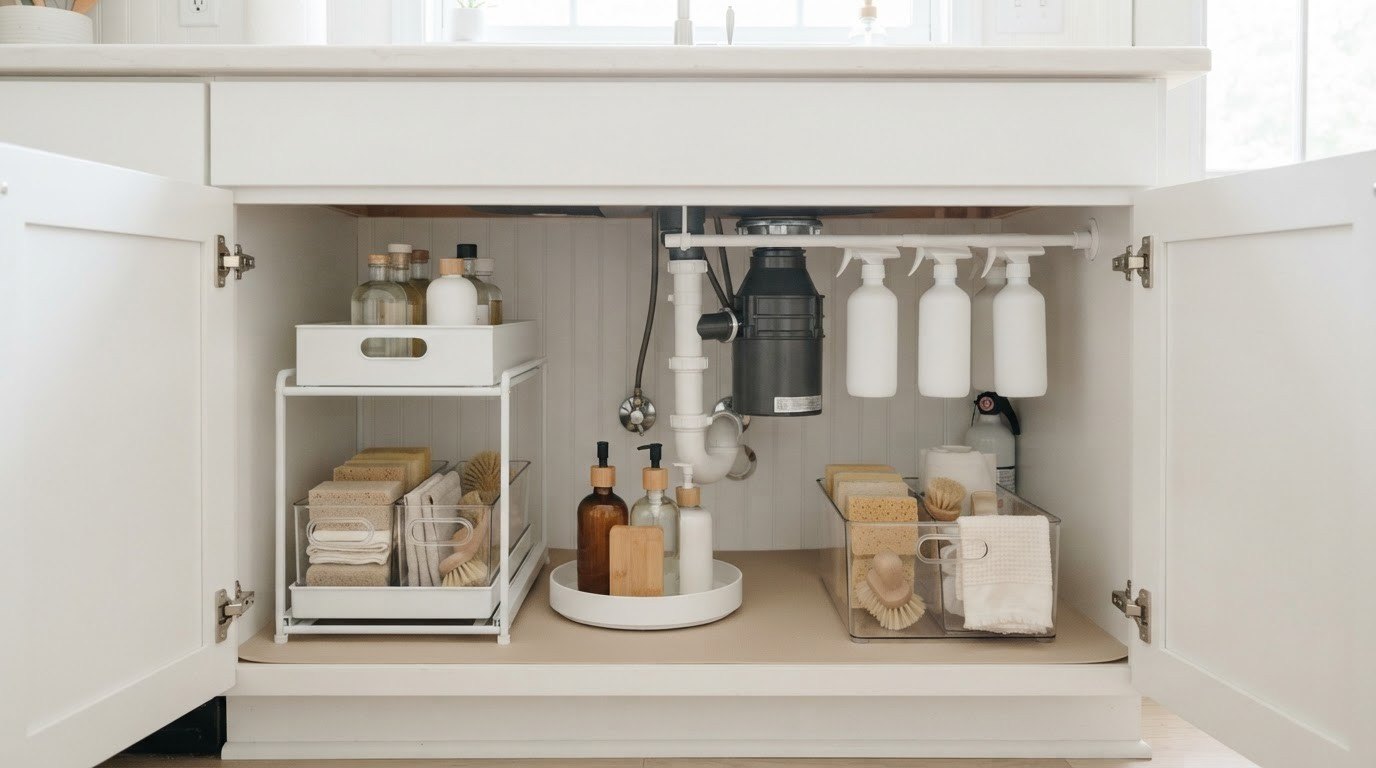
This is the hardest-working zone in most homes, and the trickiest because of the pipes. Start by emptying it completely and wiping the base. If the cabinet floor is damaged or damp, check for a slow leak before putting anything back, and consider a waterproof cabinet mat so small drips don't soak into the wood.
What belongs here: dish soap refills, dishwasher tablets, sponges and scrub brushes, your all-purpose spray, a degreaser, trash bags and a pair of gloves. What doesn't: bleach and strong chemicals if you have small children (move those up high), and anything you only use once a year.
- Use a two-tier sliding organizer on one side of the pipes. A pull-out under sink organizer with two tiers doubles the usable space and brings the back of the cabinet to you.
- Hang spray bottles by their triggers on a tension rod placed across the top of the cabinet. It's the cheapest trick there is.
- Keep sponges and brushes in a small bin with drainage holes so they dry between uses.
- Stick a trash bag roll in a shallow bin at the very front or mount a bag dispenser to the inside of the door.
For measurements, pipe workarounds and more layouts, I've gathered everything in my under-sink organization guide for kitchens and bathrooms.
A Grab-and-Go Cleaning Caddy
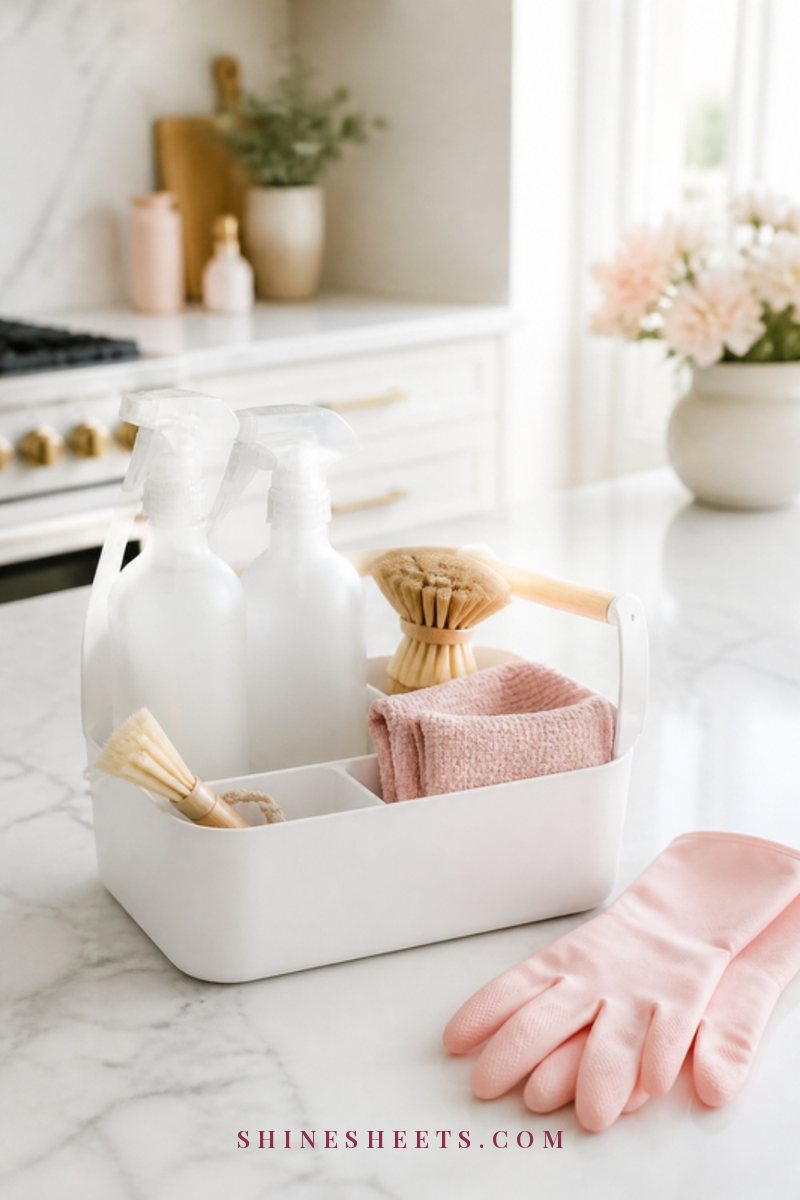
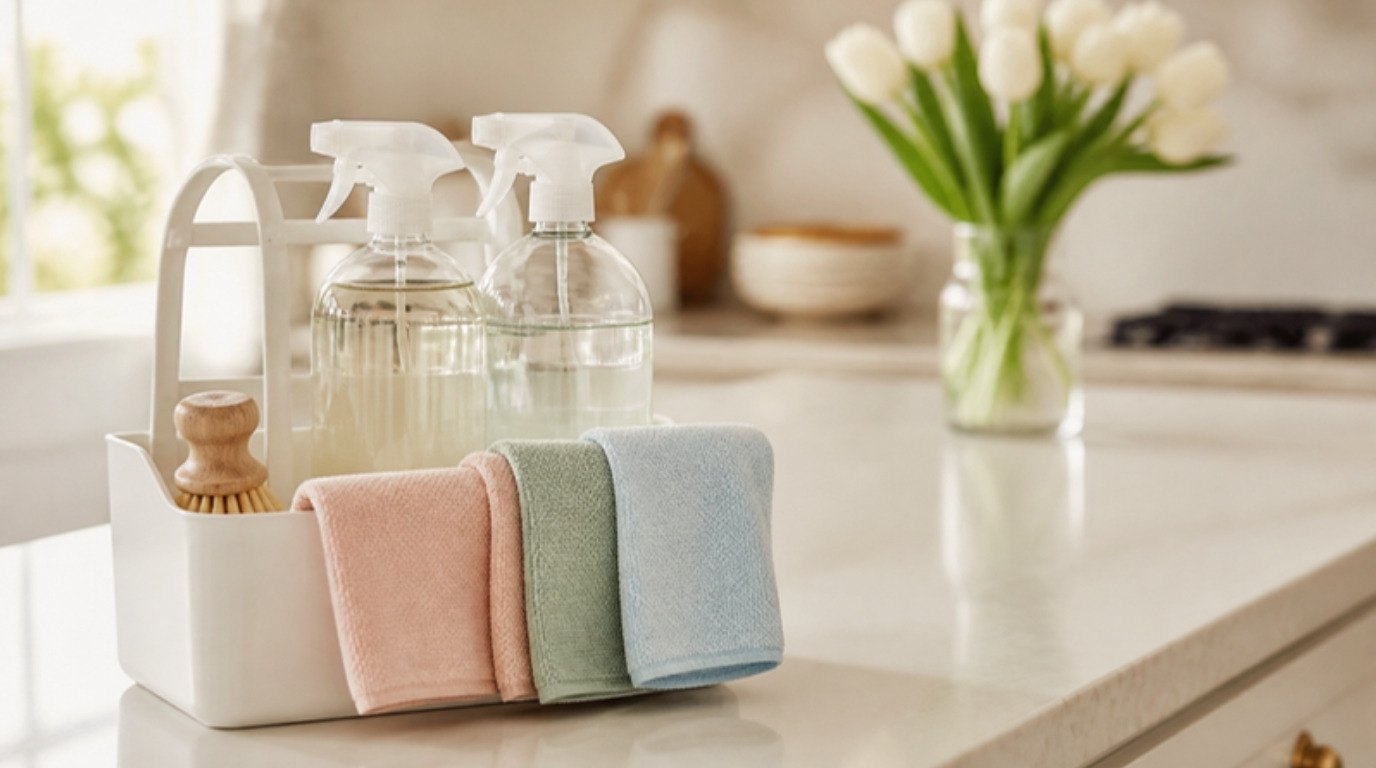
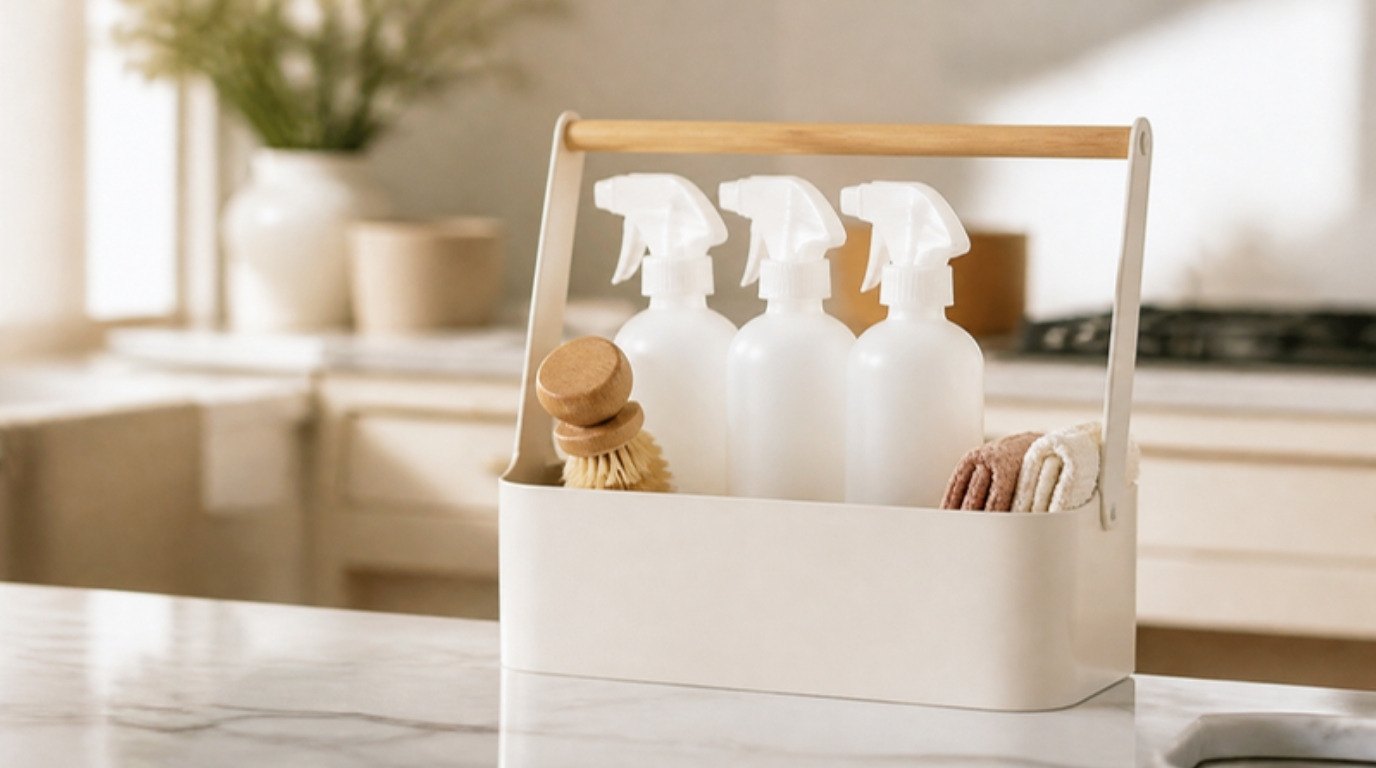
A caddy is the secret to cleaning the whole home without making ten trips. Instead of fetching supplies room by room, you carry one tidy kit with you, and when you're done, the whole thing goes back to one spot.
Look for a sturdy cleaning caddy with a comfortable handle and two or three compartments. Fill it with only the essentials:
- All-purpose spray
- Glass cleaner
- Bathroom or tub and tile cleaner
- Four to six microfiber cloths (two colors helps: one for bathrooms, one for everything else)
- A small scrub brush and an old toothbrush for grout and faucets
- A pair of gloves
That's it. If your caddy is so full that bottles fall over, it's doing too much. Restock it at the end of each cleaning session, not at the start of the next one, so it's always ready when you're in the mood. Pair it with the routine in my 20-minute bathroom cleaning routine and you'll be done before your tea goes cold.
The Laundry Room
Even if your "laundry room" is a stacked washer and dryer behind a folding door, it can hold more than you think. The goal is to keep detergent, stain remover and dryer essentials right where you load the machine, and to stop bottles from balancing on top of the dryer.
- Add a simple shelf above the machines for detergent and stain sprays. Keep heavy jugs on the lowest reachable shelf so lifting is easy.
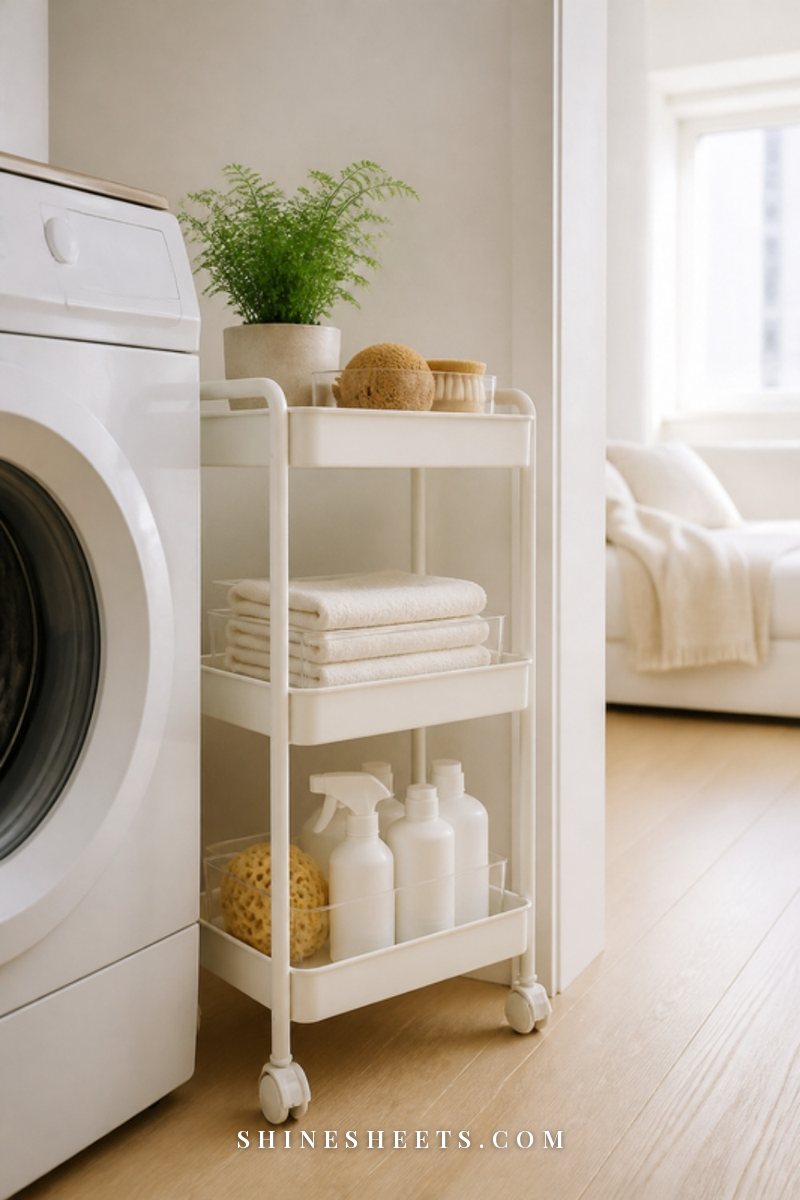
- Use a narrow rolling cart in the gap between the machines and the wall for dryer sheets, wool dryer balls and a lint roller.
- Keep a small jar or bin for things found in pockets (coins, hair ties, lip balm). It saves your drum and your sanity.
- Store bleach on its own, with the cap tight, away from any ammonia-based products.
If you'd like this space to feel lovely and not just functional, my laundry room ideas for small spaces are full of pretty, practical upgrades.
The Bathroom
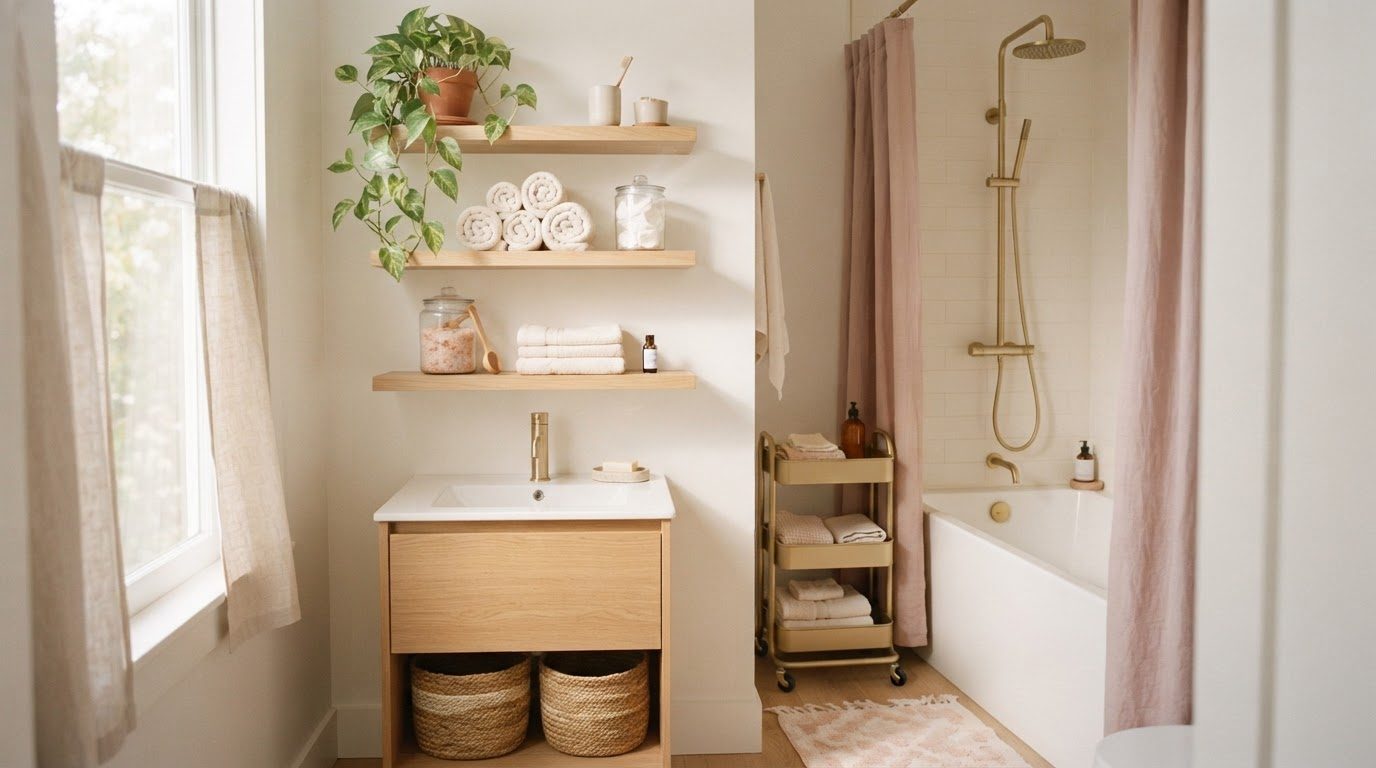
The bathroom is where a small, dedicated stash pays off the most, because the bathroom gets dirty fastest and we're all more likely to wipe it down when everything is already there. Keep it minimal: one bathroom spray, a toilet cleaner, a toilet brush in a closed holder, a microfiber cloth or two, and a squeegee for the shower glass.
- Under the sink, a small lidded bin keeps cleaning products separate from your skincare and hair tools, so nothing gets mixed up.
- Hang the squeegee on a hook inside the shower so it's used after every shower. It takes thirty seconds and dramatically cuts water spots.
- If you have little ones, use a lockable box or move bathroom cleaners to a high linen closet shelf.
- Skip storing extra paper and cleaning supplies right next to the shower, where steam softens cardboard and labels.
A Closet or Wall for Mops, Brooms and the Vacuum
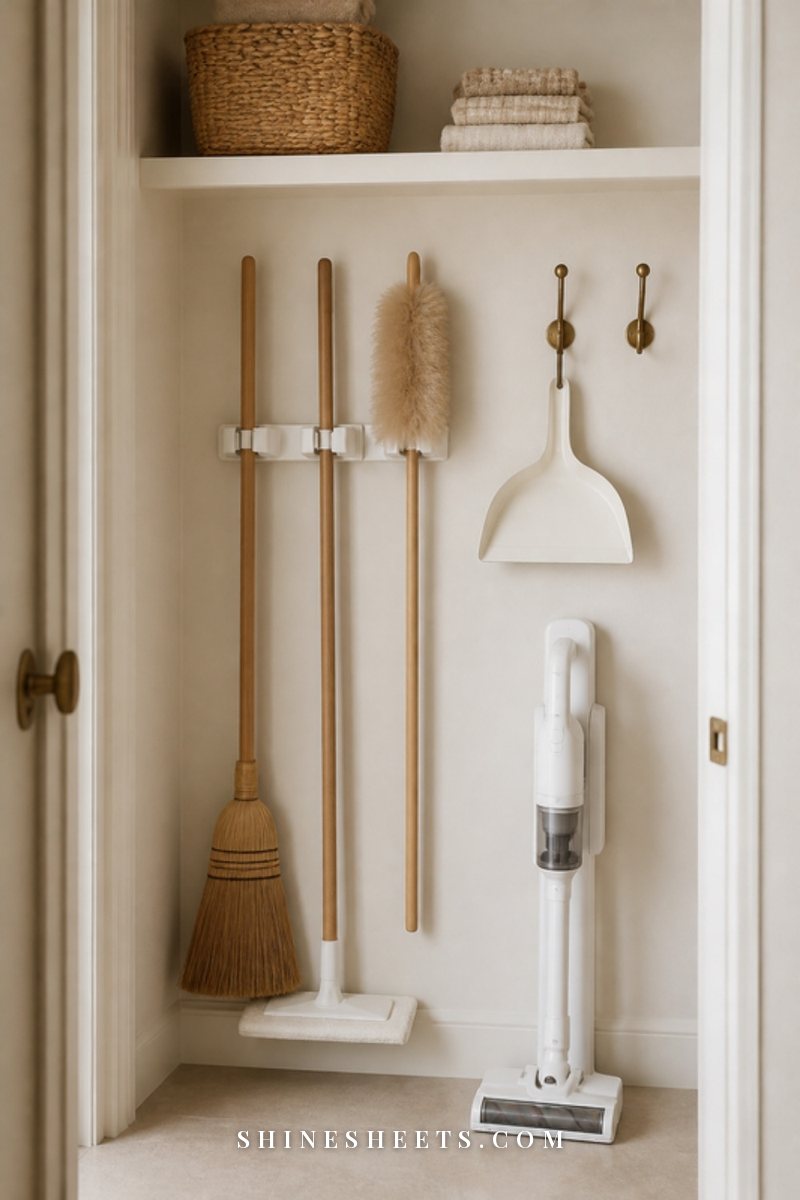
Tall tools are the ones that tumble out every time you open a door. The answer is getting them off the floor. A wall-mounted broom and mop holder grips handles securely and lets the mop heads dry properly, which also keeps them from smelling musty.
- Mount the holder at a height where the longest tool hangs just above the floor.
- Store the vacuum below, with its attachments in a small bin or on the charging dock.
- Add hooks on the back of the closet door for a dustpan, a lint roller and an extendable duster.
- Keep a basket on the top shelf for backups: refill bottles, extra sponges and spare mop pads.
No closet? A slim spot in a laundry nook, a pantry wall or even behind a door works. The key is one consistent home, so you never wonder where the broom went.
The Cleaning Supplies Zone Map
Here's the whole system in one table. Screenshot it, or copy the columns onto a sticky note and fill in your own spots. The "container" column is the part people skip, and it's the one that makes a zone stay tidy.
| Zone | What lives there | Best container |
|---|---|---|
| Under the kitchen sink | Dish soap, dishwasher tablets, sponges, brushes, all-purpose spray, degreaser, gloves, trash bags | Two-tier sliding organizer, tension rod for spray bottles, small drainage bin for sponges |
| Cleaning caddy | All-purpose spray, glass cleaner, bathroom cleaner, microfiber cloths, small brush, gloves | Handled caddy with 2–3 compartments |
| Laundry area | Detergent, stain remover, bleach (separate), dryer sheets or wool balls, lint roller | Wall shelf, slim rolling cart, lidded bin for bleach |
| Bathroom | Bathroom spray, toilet cleaner, toilet brush, squeegee, one or two cloths | Small lidded bin under the sink, hook in the shower |
| Utility closet or wall | Broom, mop, duster, dustpan, vacuum and attachments | Wall-mounted holder, door hooks, bin for attachments |
| High shelf (locked if needed) | Drain cleaner, oven cleaner, strong disinfectants, specialty chemicals | Clear bin with a lid, out of reach of kids and pets |
| Backup stock | Refill pouches, extra sponges, spare cloths, mop pads | Labeled bin on a top shelf, one per category |
A tip for the backup bin: keep it small. One spare of each item is usually enough. When you open the last spare, add it to your shopping list right then.
How To Organize Cleaning Supplies in a Small Apartment
When you're short on space, the rule becomes "fewer, smaller, vertical." You don't need a dedicated cleaning closet. You need a few clever spots that hold exactly what you use.
- Choose multi-purpose products. One great all-purpose cleaner and a cream cleanser can replace four or five specialty bottles.
- Go vertical. Over-the-door organizers with clear pockets hold sprays and cloths on the inside of a pantry or closet door.
- Use the gaps. A slim rolling cart fits beside the fridge or washer and holds a surprising amount.
- Make the caddy the cabinet. In a studio, your caddy can be the main storage. Keep it on a closet shelf and you're done.
- Pick a stick vacuum that docks on the wall. It takes up almost no floor space and charges where it hangs.
- Corral backups in one clear bin. Clear storage bins with handles slide onto a high closet shelf and let you see exactly what you have before you buy more.
Renting? Choose adhesive hooks, tension rods and freestanding carts over drilling, and you'll leave the walls just as you found them.
Refills and Decanting Without the Risks
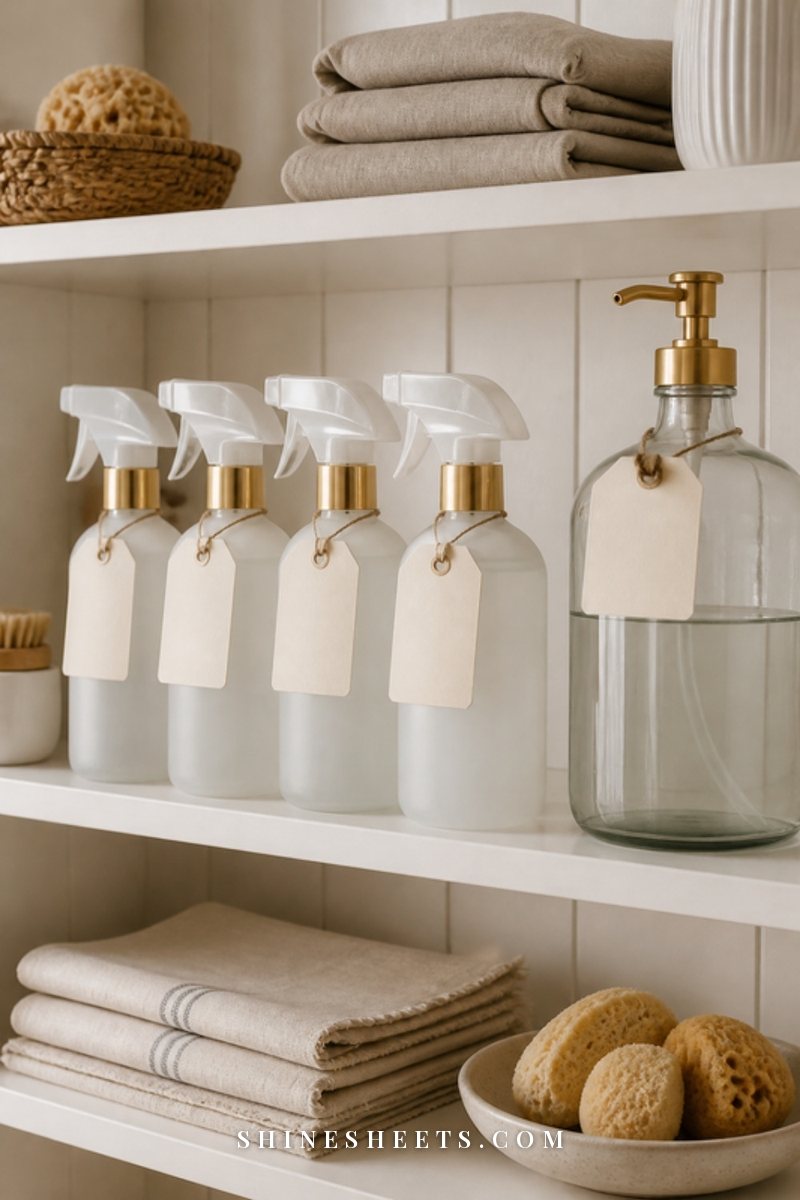
Matching bottles look calm and lovely, and refill pouches usually create less plastic waste. Decanting can be a smart move, as long as you follow a few non-negotiable rules:
- Decant only mild, everyday products such as dish soap, hand soap, all-purpose spray, glass cleaner or a simple vinegar-and-water mix. Keep bleach, drain cleaner, oven cleaner and other strong chemicals in their original containers.
- Label every bottle clearly with what's inside. A small label maker makes this quick and neat, but a waterproof label and a permanent marker work too. Add the dilution if you mixed it yourself.
- Never use food or drink bottles. A cleaner in an old water bottle or juice jar can be mistaken for something to drink, especially by kids or a tired adult at midnight.
- Use bottles made for cleaners. Glass spray bottles with a sturdy trigger hold up well to most mild cleaners, and a silicone sleeve helps protect against drops.
- Rinse well between products. Never pour one cleaner into a bottle that held a different one, because leftover residue can react.
- Keep the original label information somewhere. Snap a quick photo of the original bottle's label so you still have the instructions and warnings.
Homemade mixes (like vinegar and water) are best made in small batches you'll use within a few weeks. If you're curious which basics work well together and which combinations to avoid, the cleaning hacks that actually save time guide is a good next read.
How To Keep It Tidy for Good
The setup is the fun part. Keeping it is about small habits that take seconds:
- Put it back where you found it. If the spray lives under the bathroom sink, it goes back under the bathroom sink, not on the counter "for later."
- Do a two-minute reset monthly. Wipe drips, toss empty bottles, rinse the caddy and refill cloths. Pair it with something you already do monthly, like paying a bill.
- One in, one out. When you buy a new product, finish or donate an old one with the same job.
- Wash cloths and sponges regularly. Microfiber cloths go in the wash after every deep clean. Replace sponges every couple of weeks or as soon as they smell.
- Check what you have before shopping. Because your backups are in one clear bin, a quick glance is all it takes.
- Re-check safety every season. Make sure locks still work, caps are tight and nothing strong has drifted down to a low shelf.
Most of all, let the system serve you. If you keep finding the glass cleaner in the living room, maybe it actually wants to live there. Adjust the zone, not your personality.
Final Thoughts
Organized cleaning supplies won't make your home spotless overnight, but they remove the friction that makes cleaning feel like a big production. Fewer bottles, a few safe habits and a home for everything near the place you use it is all it really takes.
Start with one zone this week, maybe the cabinet under the kitchen sink, and notice how much easier the next wipe-down feels. Small, calm systems add up to a home that takes care of you, too.