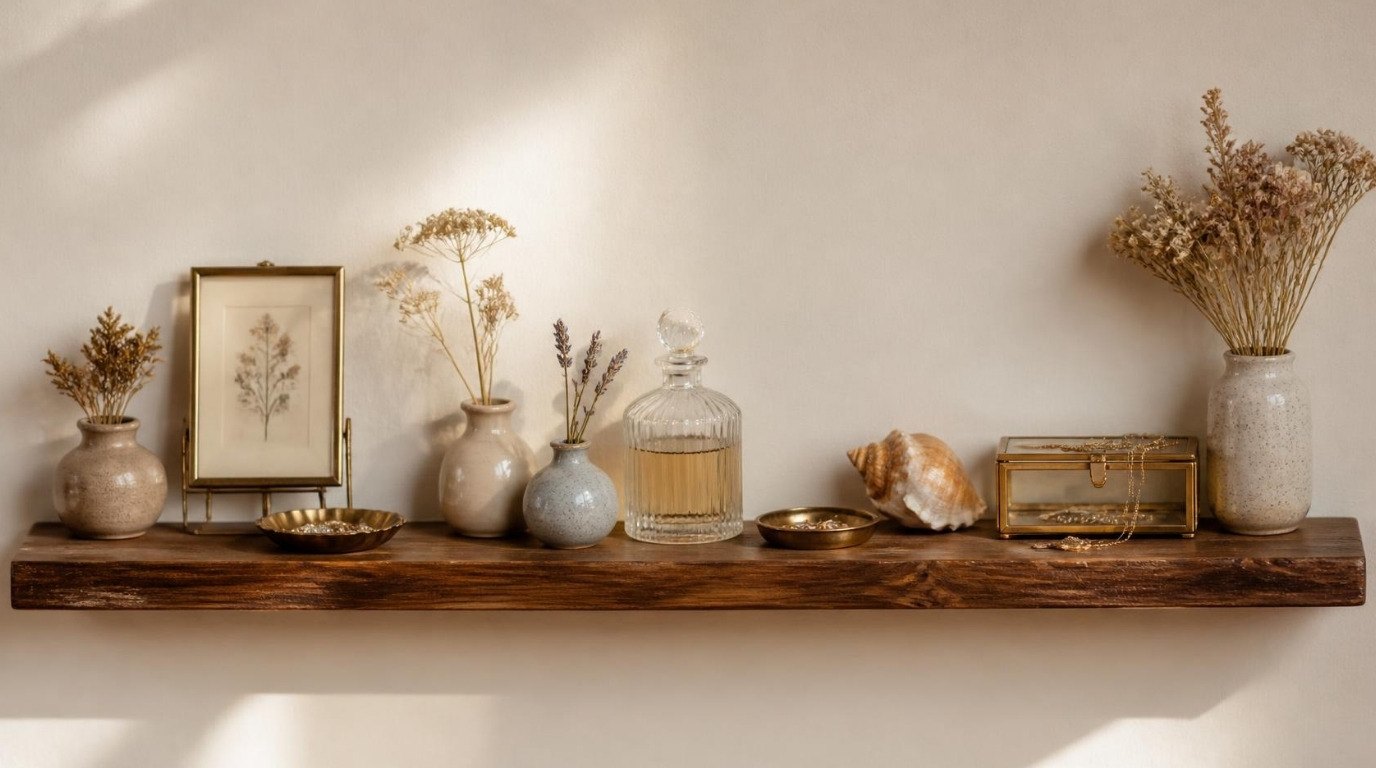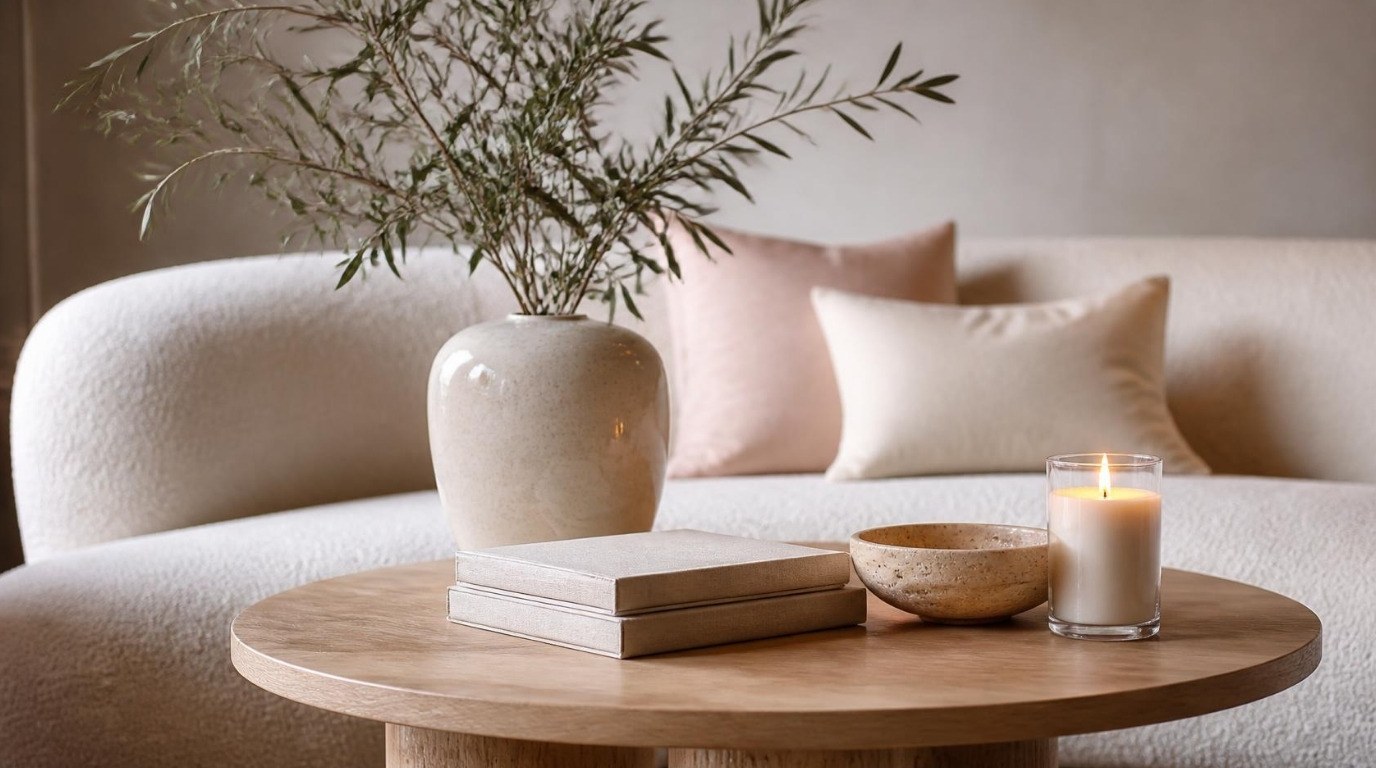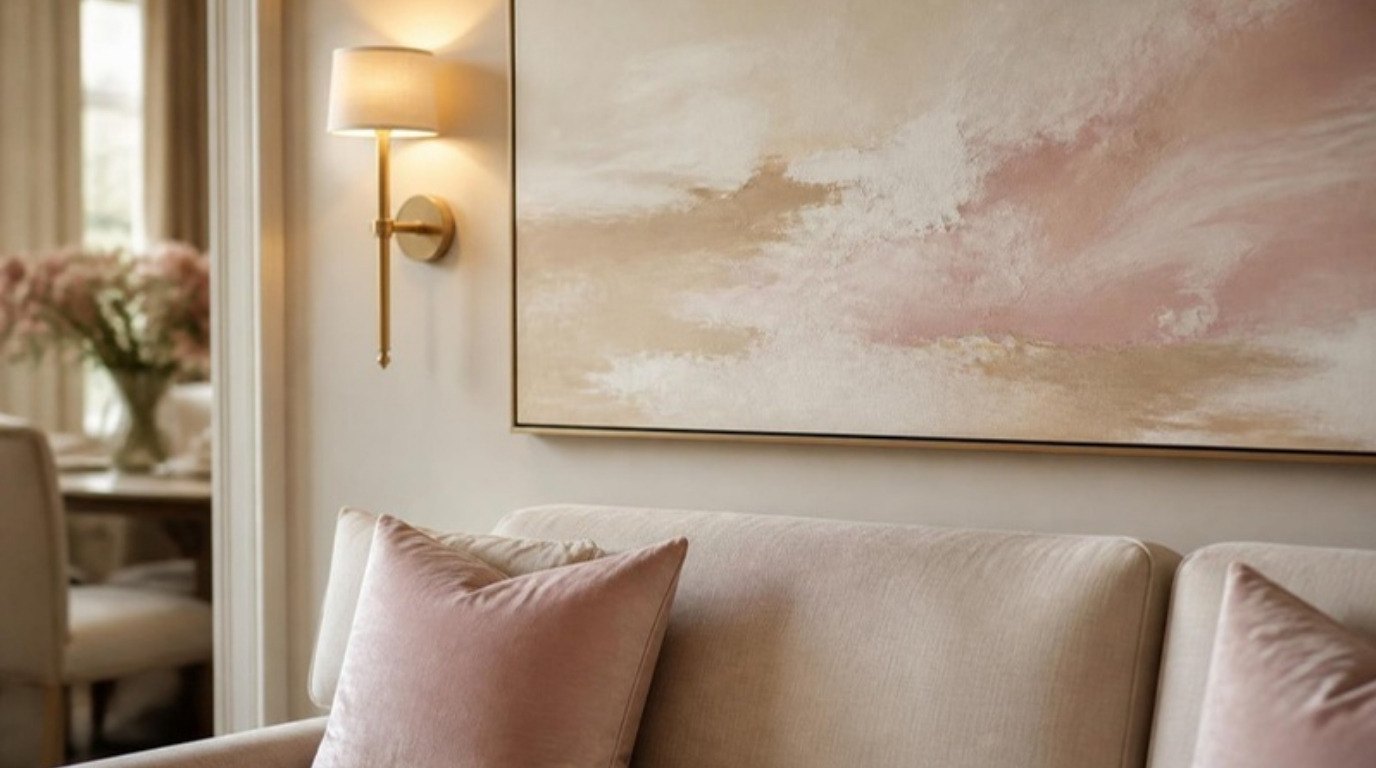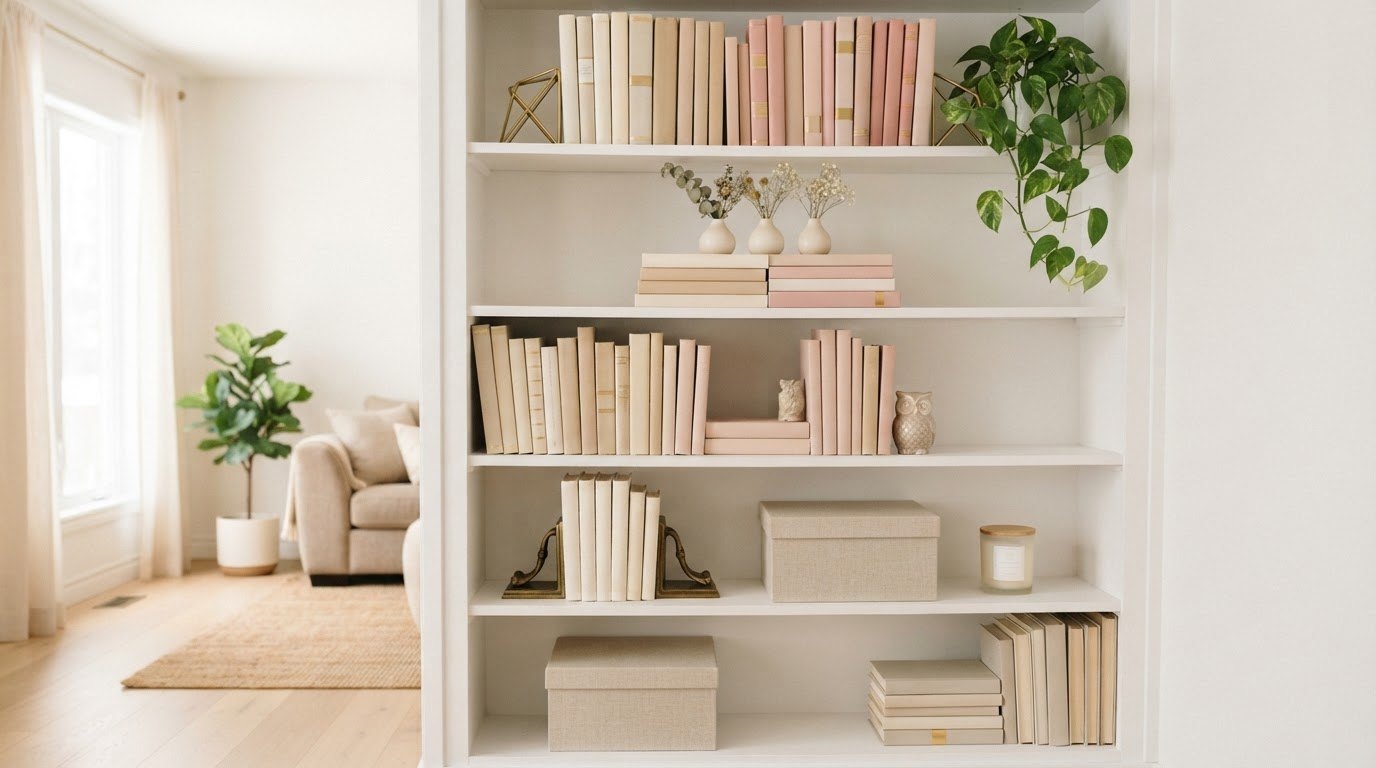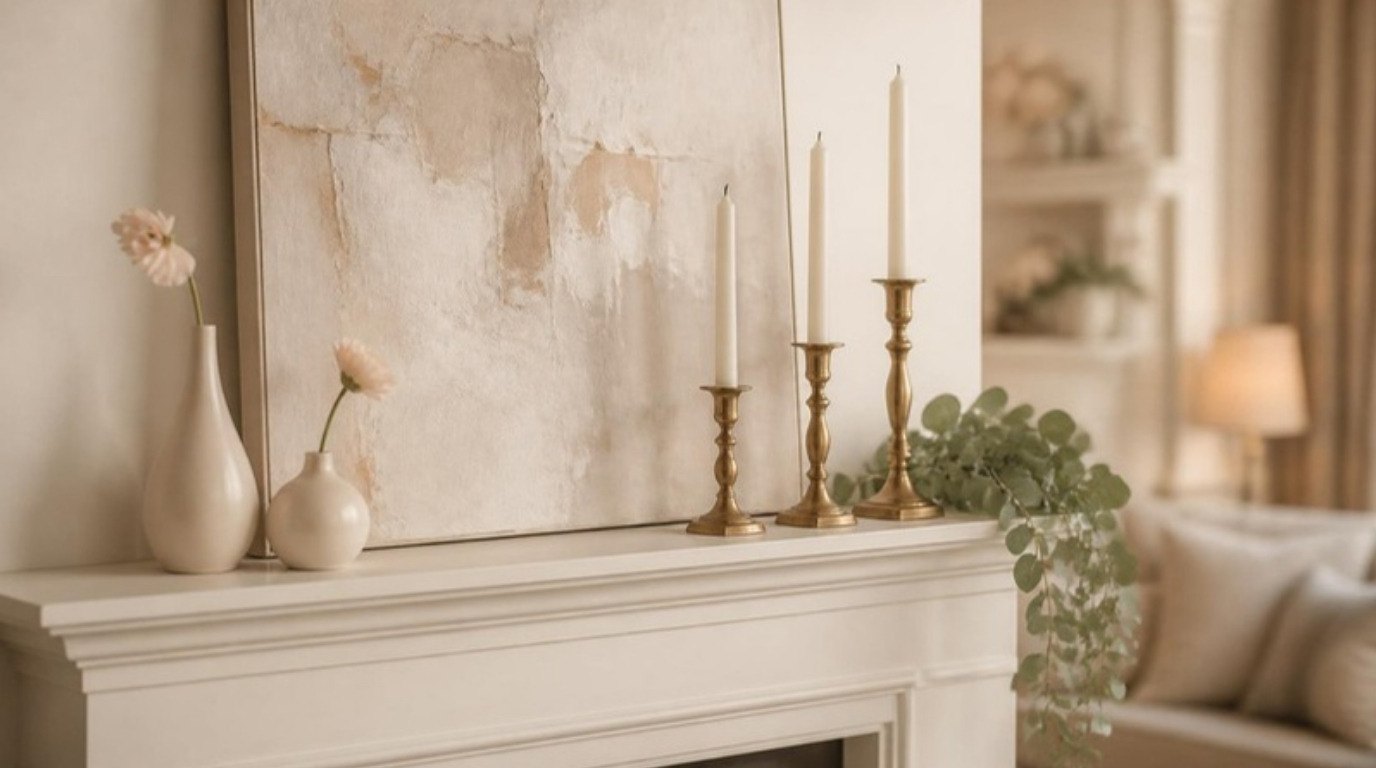
A mantel that looks collected is rarely about having nicer things. It's about how the things are arranged: one strong anchor, a few heights that rise and fall, and enough empty space that each piece gets to breathe. Get those three right and even a handful of thrifted candlesticks can look like they've been gathered slowly, over years, by someone with very good taste.
The opposite is just as true. A mantel full of lovely objects can still look cluttered if everything sits in one straight line at the same height. That's the most common mistake I see, and it's the easiest to fix.
This guide walks you through mantel decor ideas that work on a real fireplace, a faux fireplace or a simple floating shelf. You'll find the layering rules designers use, a mantel formula table you can copy zone by zone, eight ideas that always work, five styles to choose from, seasonal swaps that don't require buying anything new, and the mistakes to skip. Clear the shelf completely before you start (yes, everything) and let's build it back up properly.
Start With an Anchor Piece
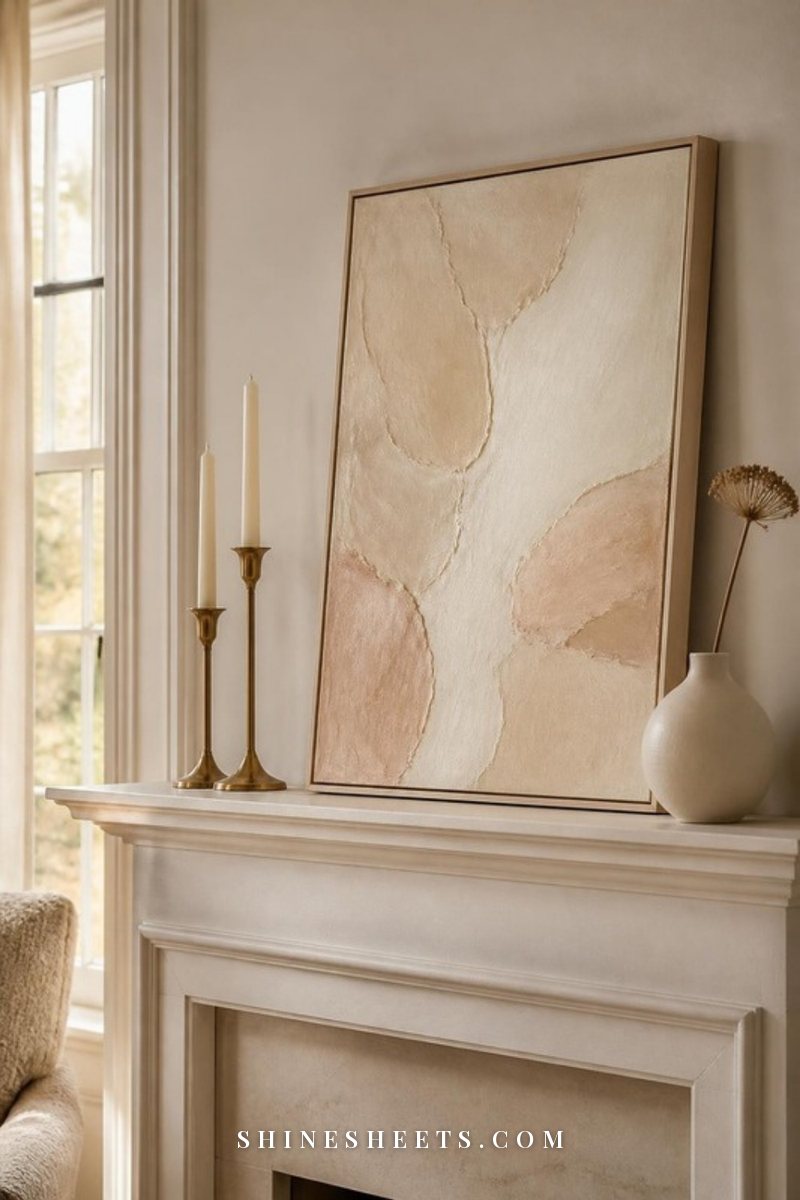
Every collected-looking mantel has one piece that's clearly in charge. Your eye lands on it first, and everything else on the shelf supports it. Without an anchor, small objects compete for attention and the whole arrangement feels scattered.
Good anchor options:
- Large art. A canvas or framed print that covers roughly two-thirds of the mantel's width. If it's smaller than half the width, it will look like it's floating.
- A round or arched frame. Curves soften the hard horizontal line of a mantel beautifully. An arched frame with a soft landscape or a simple botanical print gives you the shape without the fuss.
- A pair of oversized candlesticks or vases. If you want symmetry and no art at all, two tall matching pieces at each end can anchor the shelf together.
- A sculptural branch arrangement. A large vase with tall branches works especially well on a shallow or narrow mantel.
My favorite trick is to lean the anchor instead of hanging it. Leaning feels relaxed and easy to change, and it lets you layer smaller pieces in front. A large neutral leaning canvas in beige, cream or soft blush works with almost any style. Look for one with a slim frame and a sturdy back so it doesn't wobble, and if the mantel is deep enough, nudge the bottom edge forward about an inch so it settles against the wall at a gentle angle.
A quick sizing rule: the anchor's height should be at least a third of the distance between the mantel shelf and the ceiling, or the room swallows it. If you're planning to hang something above the shelf instead, the bottom edge should sit about 4 to 8 inches above the mantel so the two read as one unit. My guide to wall decor ideas has more on scale if you're choosing art from scratch.
6 Layering Rules That Make a Mantel Look Collected
These are the rules I come back to every single time. You don't need to follow all of them perfectly, but the more you use, the more intentional the shelf looks.
1. Vary the Heights
Aim for three distinct levels: tall (your anchor or tall candlesticks), medium (vases, a stack of books with something on top, a small frame) and low (a bowl, a small candle, a tiny trinket). When objects step up and down, your eye travels across the mantel instead of skimming along a flat line.
If two pieces are almost the same height, raise one on a stack of two or three books. Instant fix.
2. Group in Odd Numbers
Threes and fives feel natural and a little effortless. Twos and fours tend to look stiff, like they're waiting in line. Try a trio of candlesticks in three heights, or one vase, one small frame and one candle clustered together. The exception: a matching pair at both ends of a symmetrical mantel, which counts as one design idea, not two separate groups.
3. Use the Triangle Rule
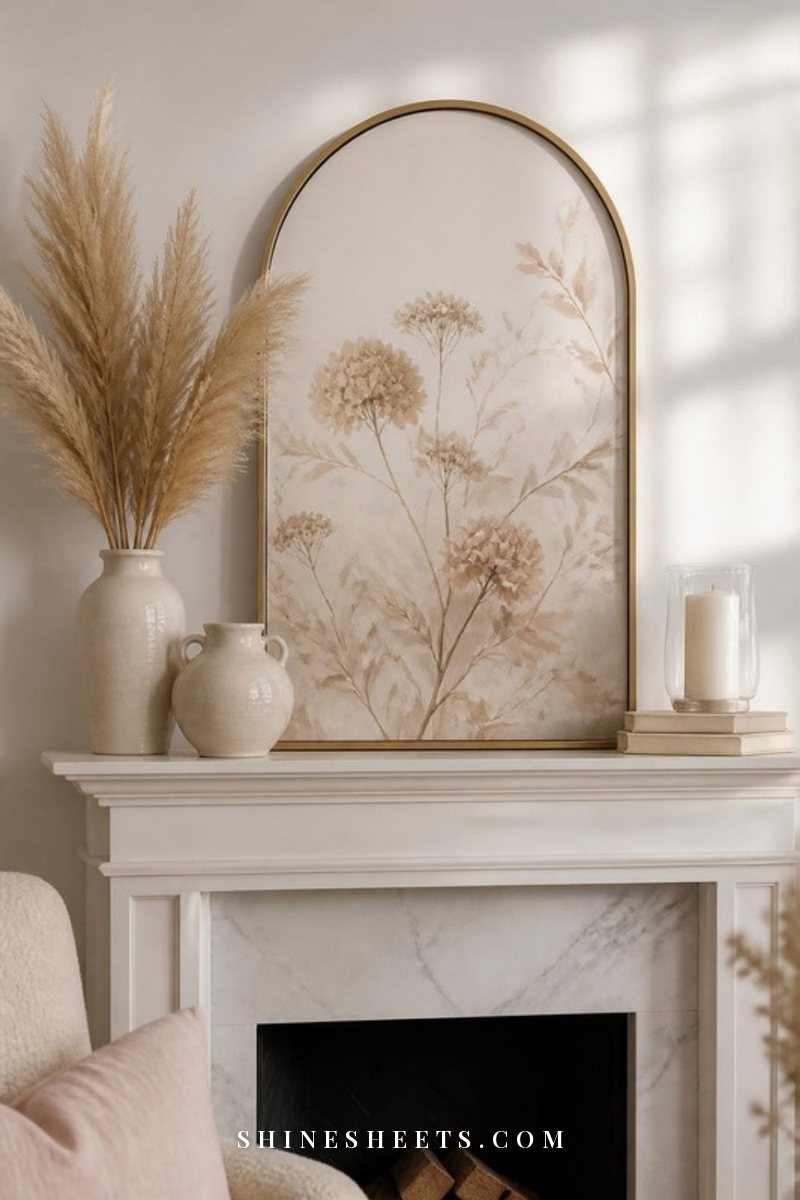
Picture an invisible triangle across your mantel. The tallest point sits in the middle (or slightly off-center), and the objects slope down toward each end. That shape is calming because it's balanced without being rigid.
For an asymmetrical version, put the high point about a third of the way in from one end, then let the rest slope down on the other side. You can also build mini triangles inside each grouping: tall candlestick at the back, medium vase in the middle, small bowl at the front.
4. Layer Front to Back
Flat mantels look like store shelves. Collected mantels have depth. Lean your art against the wall, place a medium piece slightly in front and overlapping it, then put the smallest piece at the very front edge. Overlapping by an inch or two is what makes it feel styled rather than lined up.
If your mantel is shallow (under 6 inches), skip deep layering and stick to two layers: art behind, a slim line of candlesticks or bud vases in front.
5. Add Something Soft or Living
Hard surfaces alone (frames, ceramics, brass) can feel cold. Every mantel needs one soft or organic element: a garland, a few stems, a trailing plant, dried grasses or a small linen-wrapped book. It breaks up the hard edges and makes the arrangement feel lived in.
6. Leave Breathing Room
This is the rule people skip, and it's the one that matters most. Leave at least a few inches of empty space between groupings, and don't fill the mantel all the way to the edges. Empty space isn't wasted; it's what lets your pieces look chosen. If you step back and feel even slightly overwhelmed, take one thing away.
The Mantel Formula: A Zone-by-Zone Plan
Here's the unique part of this guide. Divide your mantel into three zones (left, center, right) and fill each one with a simple role. The last column shows how to refresh it for the season using things you already own. Screenshot it and use it as your starting point.
| Zone | Item | Height | Swap for the Season |
|---|---|---|---|
| Left (back) | Tall candlestick trio or tall vase with branches | Tall to medium | Spring: blossom branches. Summer: bare candlesticks. Fall: dried grasses. Winter: evergreen clippings. |
| Left (front) | Stack of 2–3 books with a small object on top | Low | Turn the books so a lighter or darker spine faces out; switch the topper to a pinecone, shell or small candle. |
| Center (back) | Anchor: large leaning art or arched frame | Tallest | Rotate art from another room or swap the print inside the frame. |
| Center (front) | One low piece overlapping the art's bottom edge | Low | A bowl of citrus-colored ornaments, a seashell, a tea light cluster or a small bud vase. |
| Right (back) | Medium vase or glass hurricane with candle | Medium | Fill the hurricane with moss, sand, pinecones or ribbon depending on the season. |
| Right (front) | Small trinket or single bud vase | Low | Use one fresh or foraged stem: tulip, wildflower, a leaf or a sprig of greenery. |
| Full length | Garland (optional) | Low, draping | Leave it off in spring and summer; add eucalyptus or evergreen in fall and winter. |
Notice how the heights go tall, low, tallest, low, medium, low across the shelf. That rhythm is the whole secret. You can copy the plan exactly or flip left and right; either way the mantel will feel balanced.
8 Mantel Decor Ideas That Always Work
Once your anchor is in place, these are the pieces that fill the formula beautifully. Pick three or four, not all eight.
1. Lean Art Instead of Hanging It
Leaning art is the easiest way to make a mantel look relaxed and layered. You can also lean two pieces of different sizes, with the smaller one slightly in front and overlapping the larger one. Keep the colors related (two neutrals, or a neutral with one soft accent) so they read as a pair.
2. Use an Arched or Round Frame
Curves are lovely against the straight line of a mantel. A slim gold arched frame with a vintage-style landscape or a simple pressed-flower print adds a little Old Hollywood polish without feeling fussy. Look for thin gold edges rather than a chunky ornate frame, which can look heavy on a narrow shelf.
3. Stack Books on Their Sides
Books are the most underrated mantel decor. Lay two or three horizontally to create a low platform, then put a candle, a small bowl or a trinket on top. Choose books with soft spines (cream, blush, sage, linen) or turn them so the page edges face out for a calm, neutral look. If you love styling shelves, my bookshelf styling guide uses the same principle.
4. Group Candlesticks in a Trio
Three candlesticks in three heights is one of the most elegant groupings you can make. A set of brass taper candlestick holders in mixed heights does the work of a whole vignette on its own. Pair them with ivory or cream tapers, and keep them toward one end of the mantel rather than spread out. For more ways to arrange candles around the house, see how to style candles at home.
5. Line Up Bud Vases With Single Stems
A row of small vases with one stem each looks delicate and very intentional. Try three to five cream ceramic bud vases in slightly different shapes, each with a single stem: a eucalyptus sprig, a dried bunny tail, a garden rose, a leaf. Space them about two inches apart along the front edge, or cluster them tightly on one side. Bud vases are also perfect for a shallow mantel where bigger pieces won't fit.
6. Drape a Garland
A garland softens the whole shelf instantly. A faux eucalyptus garland works all year and pairs with almost every style. Let it drape off one end (asymmetrical looks more natural than perfectly even swags), and tuck it behind your candlesticks and vases rather than in front, so it looks like it's growing through the arrangement. In winter you can weave in a few real evergreen clippings for scent.
7. Add a Glass Hurricane
A clear glass hurricane candle holder gives you height, light and a little glamour, and it protects the flame from drafts. Put a pillar candle inside, or fill it with seasonal things like moss, pinecones, seashells or a loose coil of ribbon. Glass also keeps the arrangement feeling light, because your eye can see through it.
A kind safety note: keep open flames well away from garlands, dried flowers and paper, never leave candles burning when you leave the room, and don't place candles on a mantel above a fireplace that's in use. The NFPA candle safety tips are worth a quick read. Battery-powered flameless candles are a lovely alternative near greenery.
8. Bring In One Vintage Find
This is what makes a mantel look collected rather than bought. One slightly imperfect piece (a brass bowl with patina, an old cream pitcher, a small vintage frame, a piece of pottery from a flea market) adds a sense of history. You only need one. More than two starts to tip into clutter.
5 Mantel Styles To Choose From
Choosing one style helps you edit. When you know what look you're going for, it's easier to say no to the pieces that don't fit.
Classic Neutral
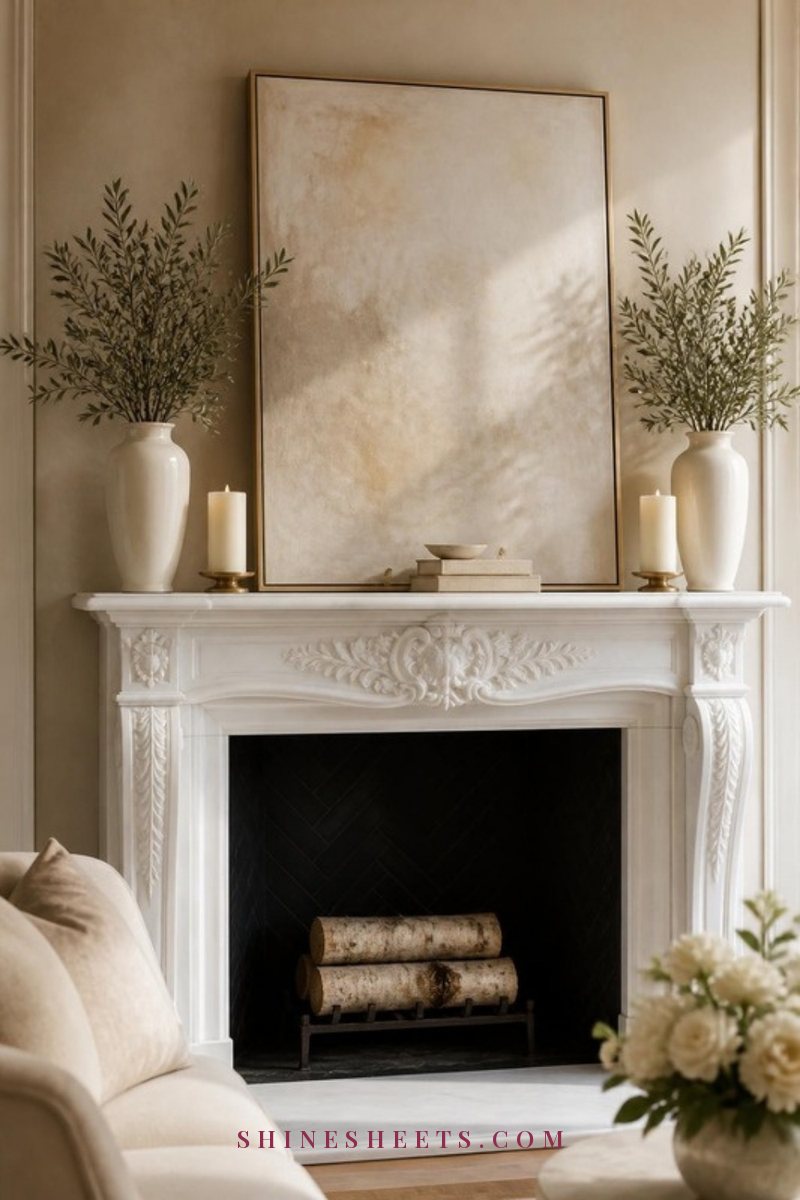
Think cream, ivory, beige, warm white and a touch of wood or brass. Symmetry works well here: matching vases or candlesticks at both ends, art in the center. Mix textures so it doesn't fall flat (matte ceramic, nubby linen, smooth glass, a woven bowl). My guide to neutral home decor goes deeper into keeping neutrals from feeling bland.
French
A French-inspired mantel feels relaxed and slightly undone. Lean an old oil painting or a soft landscape print, add a pair of mismatched brass candlesticks, a loose bunch of garden flowers in a pitcher and maybe a small stack of old books. The key is that nothing looks too perfect. A little asymmetry and a little patina are exactly what you want.
Minimalist
Three pieces, maximum. One piece of art, one sculptural vase with a single branch, one candle. The empty space is the decor. Choose objects with strong, simple shapes and keep the color palette to two tones. Minimalist mantels look especially calm in small rooms where the fireplace is already a big visual presence.
Cozy Cottage
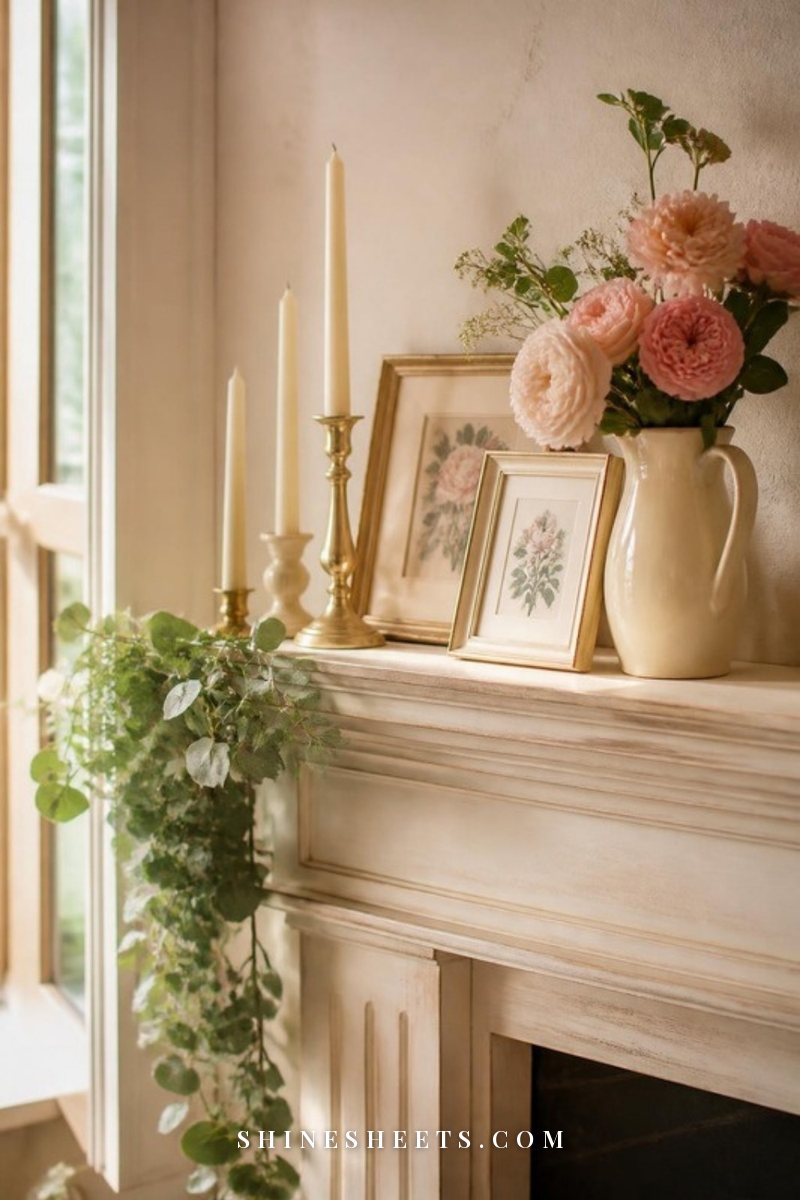
Cottage mantels are layered and warm. Overlap two or three small frames, add a garland, mix candlesticks in different materials and bring in something handmade like a ceramic jug or a woven basket at the base of the fireplace. Soft florals, sage and blush work beautifully here. If you're building a whole room around this feeling, my warm, inviting living room ideas pair well with this style.
Modern Glam
Glam is about shine and drama, used carefully. Think a large abstract canvas with gold accents, tall slim candlesticks in brass, a glass hurricane, a marble or crystal object and maybe one pale pink or champagne element. Keep the number of objects low so the shine doesn't become busy. This is where my love of Old Hollywood glamour shows up: one softly lit, beautifully styled mantel can make the whole room feel like an evening out.
How To Style a Mantel Without a Fireplace
You don't need a working fireplace to have a mantel moment. A faux fireplace surround, a deep floating shelf or even a long console against a wall can be styled exactly the same way.
- Floating shelf: mount a thick wooden shelf (at least 6 inches deep) about 48 to 54 inches from the floor, then follow the zone formula above.
- Faux fireplace surround: fill the empty firebox with a stack of birch logs, a cluster of pillar candles in glass (flameless is safest) or a large basket with a throw blanket.
- Console table: treat the tabletop as your mantel and hang or lean art behind it. Add a lamp as your tall element.
- Renters: a heavy-duty adhesive or freestanding ledge works if you can't drill. Keep it light and lean the art on the floor behind.
The rules don't change: one anchor, three heights, odd-numbered groups, breathing room. The same thinking applies to any surface you style, and if you've already read my coffee table styling formula, you'll notice how closely they match.
How To Style Your Mantel for Each Season Without Buying New
Your base stays the same all year (anchor, candlesticks, vases, books). Only the soft, living layer changes. That's what keeps seasonal decorating easy and affordable.
Spring: Fresh Stems and Lightness
Remove the garland and anything heavy. Fill your bud vases with fresh greenery from outside, blossom branches or grocery-store tulips. Turn your book spines to their lightest side and swap darker art for something airy, like a pale botanical print. Fewer objects overall feels right in spring.
Summer: Pared Back and Breezy
Summer mantels can be almost minimalist. Leave the candlesticks bare (or with white tapers you won't light on hot evenings), fill a hurricane with sand or seashells from a beach trip and add one big leafy branch in a tall vase. Let the empty space do most of the work.
Fall: Texture and Warmth
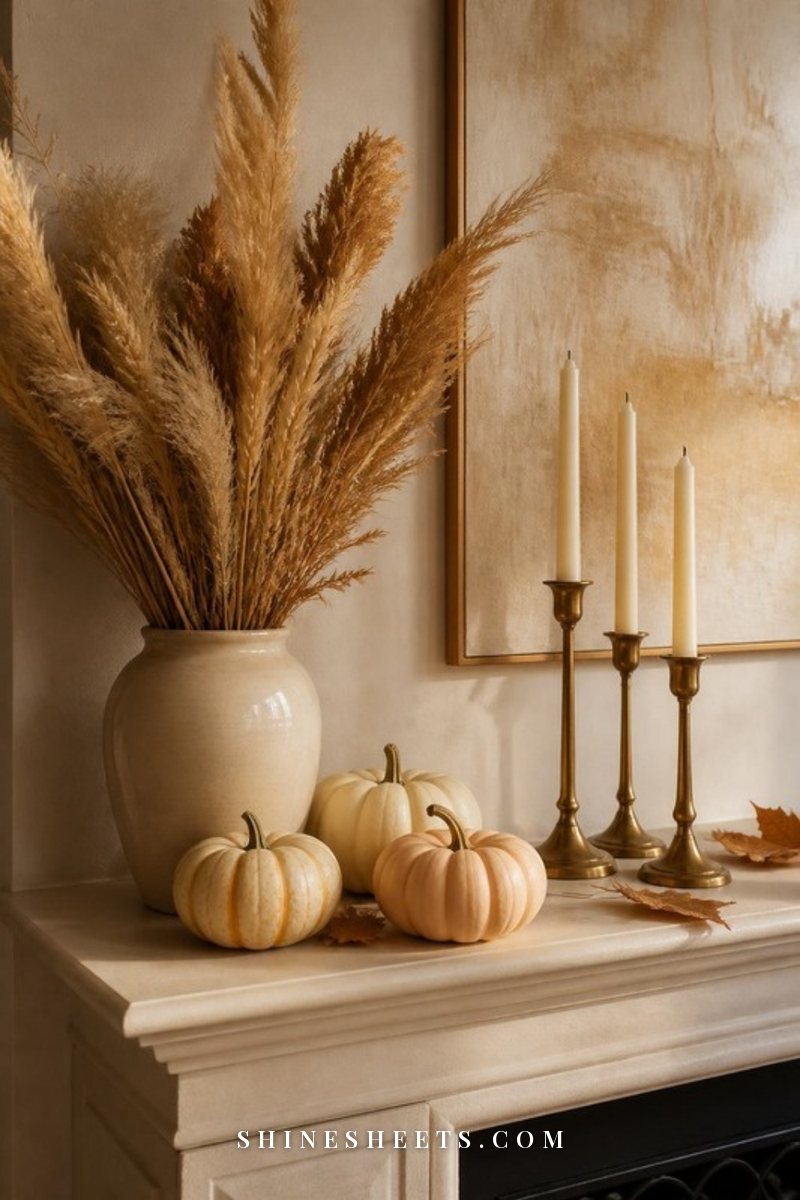
Bring in dried grasses, wheat stems, a few small pumpkins or squash in cream and pale peach, and fallen branches with leaves still on. Add warmth with candlelight: this is when the hurricane gets its pillar candle back. Your eucalyptus garland can return, perhaps with a few dried leaves tucked in.
Winter: Candlelight and Greenery
Clip a few branches of evergreen (or use leftover tree trimmings), tuck them into the garland and fill the hurricane with pinecones. Add a few more candles than usual, grouped tightly so their light pools together. If you decorate for the holidays, keep the base the same and simply add, so it's easy to take down in January. Candlelight on a winter mantel is one of the simplest pleasures of the season.
7 Mantel Mistakes To Avoid
- Too many small items. Ten tiny things look like clutter. Three medium things look styled. When in doubt, go bigger and fewer.
- Everything at one height. A flat line of objects is the number one reason mantels look unfinished. Raise something on books or add one tall piece.
- Art that's too small. A small frame floating above a big mantel looks lost. Aim for about two-thirds of the mantel width.
- Perfect symmetry everywhere. Symmetry is lovely, but a little imbalance (one grouping slightly bigger) looks more natural and collected.
- No soft element. Without greenery, stems or fabric, a mantel can look hard and cold.
- Ignoring the space below. A messy hearth distracts from a beautiful mantel. A basket of logs, a stack of throws or simply a clear floor finishes the picture.
- Buying everything at once. A collected mantel grows slowly. Start with an anchor and two groupings, live with it for a week, then add.
Here's the honest truth: I've overstyled a shelf more times than I'd like to admit, usually because I loved every single piece. The fix is always the same. Take everything off, put back only the anchor, then add one piece at a time and step back after each one. You'll know it's finished when removing anything else would make it feel empty.
Final Thoughts
A beautiful mantel isn't about spending a lot or finding the perfect piece. It's about one clear anchor, a gentle rise and fall of heights, a soft living touch and enough empty space for everything to breathe. Start with what you already have, use the formula as your map, and let the shelf change slowly with the seasons.
Give yourself permission to rearrange it as often as you like. The best mantels are never really finished, and that's exactly what makes them feel like home.