
A room can have beautiful furniture, soft lighting and a perfectly styled shelf, and still look messy because of one tangle of black cords snaking down the wall. Cords are visual noise. Your eye goes straight to them, and they quietly make a space feel unfinished, even when everything else is tidy.
The good news is that hiding cords is one of the cheapest, fastest upgrades you can make, and most of the best fixes don't need a drill, an electrician or a landlord's permission. A few clips, a box and twenty minutes per room can change how calm your home feels. I resisted doing this for far too long because it seemed fiddly, and then wondered why I hadn't done it years earlier.
This guide is all about how to hide cords and keep them organized in every room. You'll find a quick cord audit to start with, 12 renter-friendly ideas for the TV, desk, nightstand, kitchen and more, a room-by-room cord fix table, and the safety basics that matter just as much as the look.
Grab a cup of tea and a pair of scissors. Let's make those cords disappear.
Why Visible Cords Make a Room Feel Messy

Our eyes are drawn to contrast and lines. A dark cord against a light wall is both, so it pulls attention away from everything you actually want people to notice: the art, the lamp, the plants. A bundle of cables on the floor also reads as clutter, even when the room is clean, because it suggests something unfinished or temporary.
There's a practical side too. Loose cords collect dust, get tangled with vacuum cleaners, trip people up and make it hard to know which plug belongs to which device. When you hide and organize them, you're not only making the room prettier. You're making it easier to clean, safer to walk through and simpler to live in.
If you're working with a small space, this matters even more. Fewer visible lines make a room feel larger and more open, which is one of the easiest tricks in my guide to making a small room look bigger.
Before You Start: A 15-Minute Cord Audit
Before buying anything, spend fifteen minutes walking through your home with a notebook. It saves money and stops you from ordering organizers you'll never use.
- Unplug what you don't use. Old chargers, the lamp that hasn't worked in months, the speaker you forgot about. Coil and store them, or donate them.
- Count the cords in each spot. Two cords behind a nightstand need a different fix than eight behind a TV.
- Measure the distance from each device to the nearest outlet. This tells you how long your raceways, sleeves or extension cords need to be.
- Note the surface. Painted wall, wooden furniture, baseboard, under a desk? Adhesive products stick differently to each.
- Check for problems. Frayed cords, warm plugs or power strips plugged into other power strips need fixing first, not hiding.
Now you have a short shopping list instead of a basket full of random gadgets.
12 Ways To Hide Cords in Every Room
These ideas are organized by the spots where cords usually gather. Most of them are renter-friendly and cost very little.
1. Tame the TV and Media Console

The media console is usually the worst cord offender: TV, streaming box, speaker, game console and router all in one place. Start by pulling the console about 15 cm (6 inches) away from the wall so you can work behind it. Plug everything into a single surge-protected power strip, bundle the cords from each side of the console together, and run them down one back leg rather than letting them hang in a curtain.
If your console has a closed back, drill-free cord holes are often already there. If not, a small woven basket or lidded box on a shelf can hold the router and extra cables while keeping the front looking calm.
2. Hide a Wall-Mounted TV Cord With a Paintable Raceway
A wall-mounted TV with a cord dangling beneath it is a very common sight, and a white paintable cord cover raceway is the easiest fix. It's a slim plastic channel with an adhesive back: you cut it to length, stick it to the wall from the TV down to the outlet and snap the cover over the cords.
For the cleanest look, paint it the same color as your wall with a small brush and leftover wall paint. Once it's dry, it nearly disappears. Clean the wall with a little rubbing alcohol first so the adhesive holds, and press each section firmly for 30 seconds.
3. Clear the Desk With an Under-Desk Cable Tray

A home office desk collects cords faster than any other surface: laptop charger, lamp, phone charger, monitor, maybe a printer. An under-desk cable tray mounts underneath and holds the power strip and excess cable off the floor, so only one cord runs down to the outlet.
Many trays clamp onto the desk edge without screws, which is perfect for renters. Once everything sits in the tray, use one cord clip at the back edge of the desk to guide each cable up to its device. For more ideas on making a workspace feel calm, my guide to desk organization ideas goes beyond cables.
4. Bundle Desk Cables With Velcro Ties
Velcro ties are the simplest tool in the whole cord kit. Gather cords that run in the same direction and wrap a tie every 30 cm (12 inches) or so. Unlike zip ties, they're reusable and adjustable, so you can add or remove a cable without cutting anything.
A pack of reusable velcro cable ties is also useful for coiling extra cord length. Loop the excess into a neat bundle about the size of your palm, fasten it, and tuck it behind the device.
5. Create a Nightstand Charging Spot

Charging cables tend to crawl across nightstands like vines. Pick one spot for charging, ideally a small tray or the inside of a drawer, and run the cable to it in one clean line. A small adhesive clip on the back edge of the nightstand holds the end of the cable in place so it doesn't slip behind the furniture every night.
If your nightstand has a drawer, you can drill-free route a cable through the back gap and charge your phone inside it, which also keeps it out of reach at bedtime. My guide to nightstand styling has more ways to keep that surface calm and pretty.
6. Corral Kitchen Appliance Cords
Kettles, toasters and coffee makers all come with cords that are longer than you need. Coil the excess at the back of the appliance and secure it with a velcro tie, leaving just enough length to reach the outlet comfortably. Many appliances have a built-in cord wrap underneath that people forget about, so flip yours over and check.
For appliances you use less often, store them in a cabinet with the cord wrapped around them. Fewer things plugged in on the counter is the most effective kitchen cord fix there is, and it makes wiping the counter much easier.
7. Guide Floor Lamp Cords Along the Baseboard
A floor lamp cord stretched across the middle of the floor is both untidy and a trip hazard. Instead, route it along the baseboard to the nearest outlet. Small adhesive clips placed every 40–50 cm (16–20 inches) on the top edge of the baseboard hold the cord neatly in the shadow line, where it's hard to notice.
Choose white or clear clips for white baseboards. If the lamp has to sit far from an outlet, move the lamp rather than running a cord across a walkway.
8. Let Furniture Do the Hiding
Sometimes the best cord cover is the furniture you already have. A sofa, bookcase, dresser or plant stand placed in front of an outlet hides the plug and the first part of the cord completely. Run the cord down a back leg of the furniture with two or three clips and it will vanish from view.
Large plants in baskets, a stack of books on the floor beside a chair, or a pretty floor basket can also hide a short stretch of cord near an outlet. Just leave a little air space around power strips so they don't overheat.
9. Put Power Strips in a Cable Box
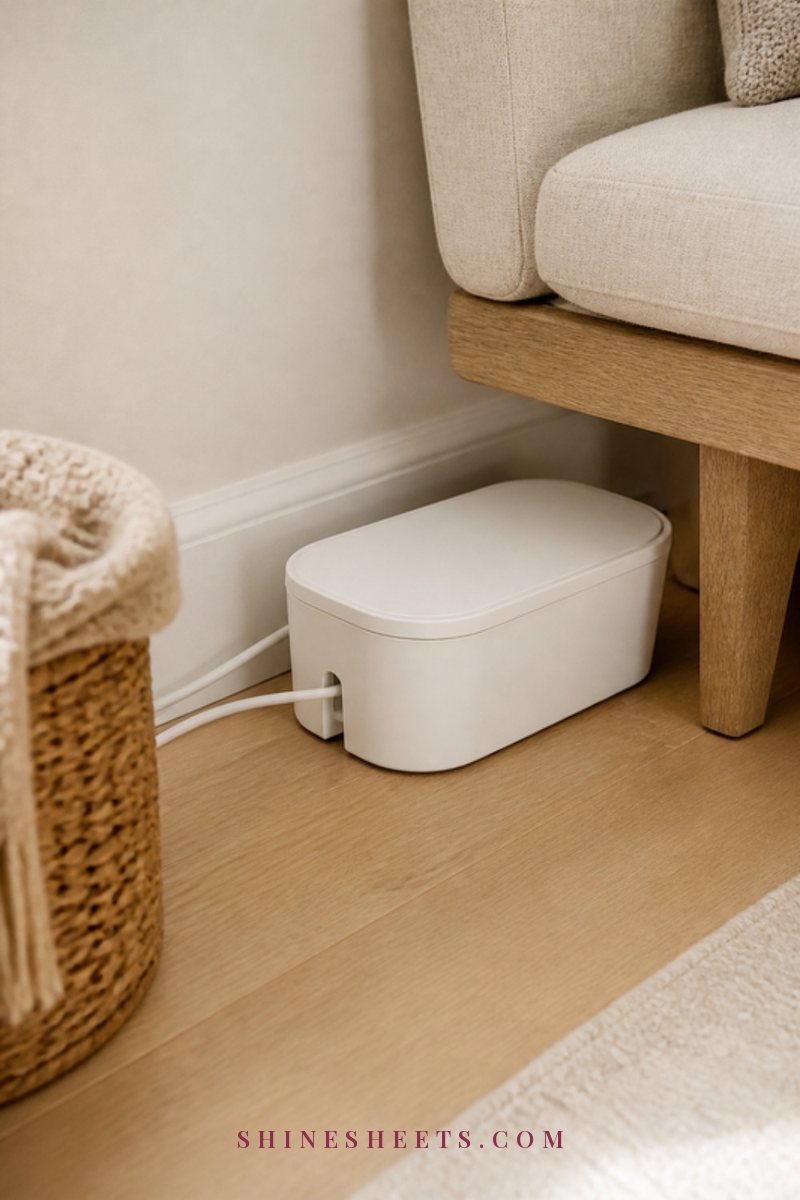
A power strip with six plugs is never going to look pretty, but it can disappear. A white cable management box holds the strip and the plugs inside, with slots on each side for cords to come in and out. It turns a tangle into a simple, smooth shape that blends in near a sofa, desk or TV console.
Choose one with ventilation holes and don't pack it so tightly that the lid bulges. Heat needs somewhere to go.
10. Use Adhesive Cable Clips for Edges
Small adhesive cable clips are the most versatile tool here. Use them on the back of furniture, under shelves, along door frames and on the edges of desks to keep cords from dangling. Clear or white versions disappear against most surfaces.
Clean the surface first, press for 30 seconds and wait a few hours before putting weight on them. To remove them later without damage, gently warm the adhesive with a hair dryer for a few seconds and peel slowly.
11. Wrap Loose Bundles in a Cable Sleeve
When several cords travel together, for example from a desk to the floor or from a TV console to the wall, a cable sleeve turns them into one smooth tube instead of a messy bunch. Most sleeves zip or wrap around the cords, so you can add more later.
A white or beige sleeve against a light wall looks far calmer than four dark cords. Cut it to length and finish the ends with a velcro tie so they don't fray or slide.
12. Label Every Plug
Labeling isn't about hiding cords, but it makes everything else easier. A small tag on each plug ("lamp", "router", "speaker") means you never have to crawl behind furniture unplugging the wrong thing. You can use simple washi tape and a fine pen, or folded label tags around each cord near the plug.
This takes ten minutes and saves frustration every time you move furniture, reset the router or clean behind the TV.
Renter-Friendly, No-Drill Options
If you rent, you can still hide almost every cord in your home. Here's what works without holes in the walls:
- Adhesive raceways for wall-mounted TVs and cords running down walls. Remove gently with heat.
- Removable adhesive clips on baseboards, furniture and door frames.
- Clamp-on under-desk trays that need no screws.
- Cable boxes for power strips, which simply sit on the floor or a shelf.
- Velcro ties and cable sleeves, which attach to the cords, not the walls.
- Furniture placement, the most underrated renter trick of all.
- Baskets and lidded boxes for routers, chargers and extension cords.
Before using any adhesive, test one clip on a hidden spot for a few days to check that it removes cleanly from your paint. For more small, deposit-safe upgrades, my guide to apartment decor on a budget is full of ideas.
When You Can't Hide a Cord, Make It Blend In
Some cords simply have to stay visible: a pendant lamp swag, a lamp in the middle of a console, a charger by your reading chair. In those cases, the goal shifts from hiding to blending, and it works surprisingly well.
- Match the cord to the wall. A white cord on a white wall almost disappears, while a black one draws a line straight to itself. Many lamps and extension cords come in white, and replacing a dark extension cord is an easy swap.
- Choose fabric-covered cords for lamps and pendants you see every day. A cream or linen-look braided cord looks intentional, more like a design detail than an afterthought.
- Follow the architecture. Run visible cords along existing lines, like door frames, baseboards, the edge of a bookcase or the corner where two walls meet. Straight, deliberate lines read as tidy; diagonal or drooping ones read as messy.
- Keep the length tight. A cord that runs directly to the outlet looks far neater than one with a loose loop on the floor. Coil any excess behind the furniture.
- Style around it. A trailing plant, a stack of books or a small sculpture placed in front of a short visible stretch draws the eye elsewhere.
Common Cord-Hiding Mistakes
A few small missteps can make cord organizing frustrating or even unsafe. Here's what to avoid:
- Buying organizers before measuring. Raceways that are too short or boxes that are too small end up in a drawer. The audit above solves this.
- Skipping the surface prep. Adhesive clips and raceways fall off dusty or greasy surfaces. Wipe with rubbing alcohol and let it dry first.
- Using zip ties everywhere. They're cheap, but they have to be cut every time you change something, and pulling them too tight can damage cords.
- Hiding a problem instead of fixing it. A cracked cord in a pretty sleeve is still a cracked cord.
- Trying to do the whole home in one afternoon. One spot at a time is far more satisfying, and you'll learn what works before tackling the next room.
Room-by-Room Cord Fix Table
Here's a quick reference for the most common cord problem in each room and the simplest fix. Screenshot it before your next shopping trip.
| Room / spot | Typical problem | Best fix | Time needed |
|---|---|---|---|
| Living room TV console | Tangle of 4–8 cords behind and below | One power strip, cords bundled down one leg, router in a basket | 30 minutes |
| Wall-mounted TV | Single cord hanging down the wall | Paintable adhesive raceway | 20 minutes plus paint drying |
| Home office desk | Cords dangling to the floor | Under-desk tray plus velcro ties | 30 minutes |
| Nightstand | Charger slipping behind furniture | One adhesive clip and a charging tray | 5 minutes |
| Kitchen counter | Long appliance cords everywhere | Coil and tie excess, store rarely used appliances | 15 minutes |
| Floor lamp | Cord across the floor | Clips along the baseboard, move lamp near outlet | 10 minutes |
| Behind the sofa | Power strip and lamp cords visible | Cable box plus furniture placement | 10 minutes |
| Bathroom | Hair tool cords on the counter | Store tools unplugged in a basket or drawer | 5 minutes |
Cord Safety Basics
Hiding cords should never come at the cost of safety. A few simple rules keep things pretty and safe:
- Don't run cords under rugs or carpets. Being walked on can damage the cord without you noticing, and the heat has nowhere to go. Route cords around the rug instead.
- Don't overload outlets or power strips. Check the rating on your power strip and avoid plugging high-wattage appliances like space heaters or kettles into one.
- Never plug a power strip into another power strip. If you need more outlets, use one surge protector with enough sockets.
- Keep cords away from heat. No cords behind radiators, near heaters or pinched against hot lamps.
- Don't pinch cords behind furniture pushed tight against the wall, or in doors and windows.
- Replace damaged cords. Frayed, cracked or warm cords should be replaced, not taped and hidden.
- Leave air around chargers and power strips. Boxes and baskets should be ventilated and not packed tight.
If a plug or outlet ever feels hot, smells like burning or sparks, unplug it if it's safe to do so and have it checked by a qualified electrician.
How To Keep Cords Tidy Long Term
The first big tidy-up is the hard part. After that, a few small habits keep things looking calm:
- One in, one out. When a new device arrives, remove the old cord and charger instead of adding to the pile.
- Keep a small cord kit in a drawer: a few velcro ties, spare clips, label tags and scissors.
- Check behind furniture monthly while you vacuum. Re-clip anything that has slipped.
- Store spare cables in one place, coiled and labeled, in a lidded box rather than scattered in drawers.
- Use fewer, longer-lasting cables. A good braided charging cable often replaces three cheap ones.
If your workspace is where cords build up fastest, my guide to creating a calm, comfortable home office shows how to plan the layout so cables stay out of sight from the start.
Final Thoughts
Hiding cords is one of those small jobs that makes a surprisingly big difference. Once the tangles are gone, your favorite pieces finally get the attention they deserve, and the whole room feels quieter and more finished.
Start with the spot that bothers you most, whether it's the TV, the desk or the nightstand, and give it twenty minutes this weekend. One calm corner tends to inspire the next, and before long the cords will simply stop being something you notice.