A tunneling candle is almost never a "bad candle." In most cases it's a candle that learned the wrong shape on its very first night, and then kept repeating it. Wax has a memory. Whatever melt pool you create the first time you light a candle becomes the boundary it tends to follow for the rest of its life, which is why one rushed half-hour burn can leave a perfectly good jar with a deep hole in the middle and a thick ring of wasted wax clinging to the glass.
The good news is that tunneling is one of the most fixable problems in your home. It comes down to time, wick length and where the candle sits, and once you know the numbers, it's easy to get right every single time. I love glass candles more than is probably reasonable, and it took me a few sad, half-used jars to accept that the first burn deserves a little planning.
This guide covers how to stop candle tunneling from the first light onward: what tunneling actually is, the four reasons it happens, a burn time table by jar size, six everyday habits that prevent it, a step-by-step foil fix for candles that have already tunneled, and small ways to make every candle last longer. There's also a short safety section, because a candle is still an open flame, however pretty the jar.
What Candle Tunneling Actually Is
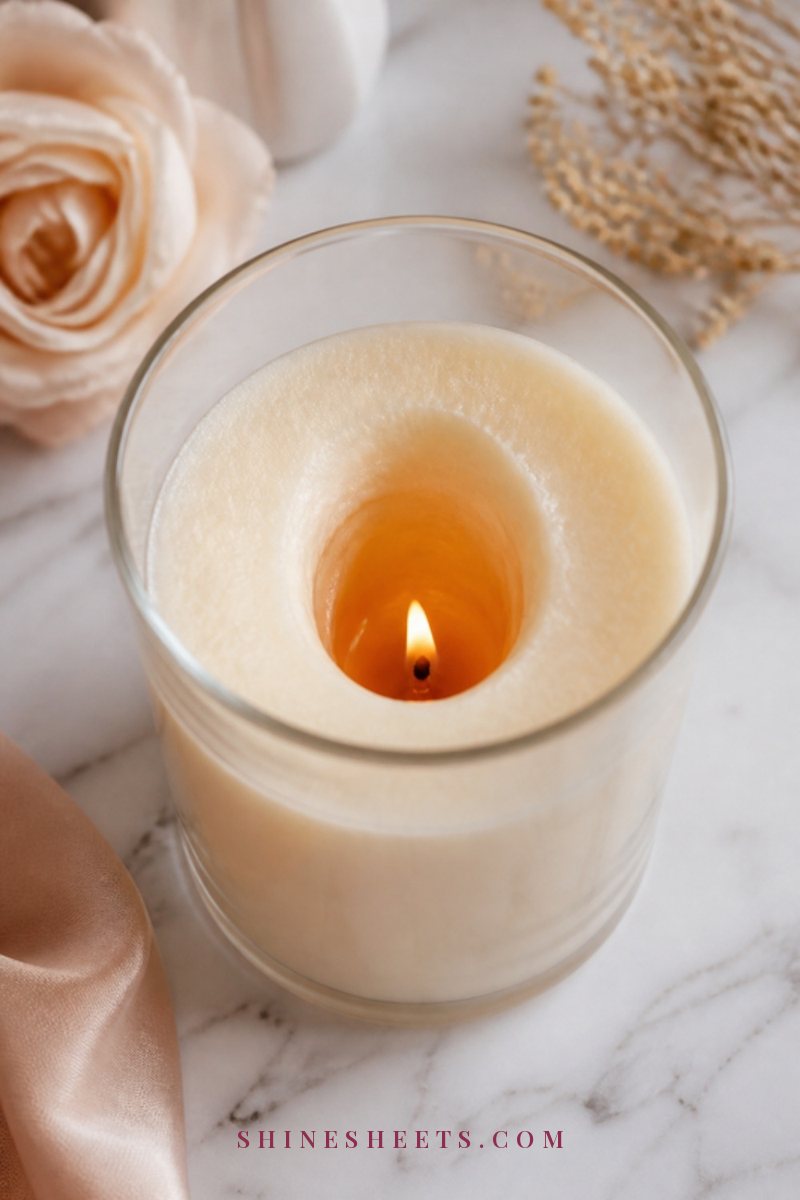
Candle tunneling happens when the wick burns straight down through the middle of the wax and leaves a solid wall of unmelted wax around the sides. From above it looks like a little well. The flame sinks lower and lower into the hole, the hole gets narrower, and eventually the wick drowns in its own pool or the flame gets so starved of air that it flickers, smokes and goes out.
A healthy candle looks different. After a proper burn, the whole surface is liquid from edge to edge, the wax sets back flat and even, and the next burn starts from a smooth surface instead of a crater. You'll also notice the scent is stronger on a candle that melts fully, because a wider melt pool releases more fragrance into the room than a narrow tunnel ever can.
Tunneling matters for three reasons:
- Wasted wax. The ring around the edges never burns, so you can lose a third of the candle or more.
- Weaker scent. A narrow pool simply throws less fragrance.
- A messier flame. A wick sitting deep in a tunnel is more likely to smoke and leave black soot on the glass.
If you've ever wondered why a candle that smelled lovely in the store seemed faint at home, a tunnel is often the reason.
Why Candles Tunnel: 4 Common Causes
Tunneling has a handful of usual suspects. Most of the time it's one of these, and sometimes it's two working together.
1. A First Burn That Was Too Short
This is the big one. If you light a new candle for twenty minutes, blow it out and put it away, the wax only melts in a small circle around the wick. That circle becomes the candle's "memory ring." Every later burn tends to melt only inside that ring, so the tunnel deepens a little each time, even if you burn it for longer later on.
Think of the first burn as setting the candle's footprint. It takes patience once, and then the candle mostly takes care of itself.
2. A Wick That's Too Small for the Jar
Some candles are simply under-wicked. A single thin wick in a very wide jar can't create enough heat to melt wax all the way to the glass, no matter how long you burn it. If you've done a full, patient first burn and the pool still stops a centimeter or two from the edge, the wick size is probably the issue, not you.
Wide candles (roughly over 10 cm / 4 inches across) usually need two or three wicks to melt evenly. When you shop for a new candle, a quick look at the wick-to-jar ratio tells you a lot.
3. Drafts and Uneven Surfaces
A breeze from a window, a ceiling fan, an air vent or a busy doorway pushes the flame to one side. The wax melts faster on that side and barely at all on the other, which creates a lopsided tunnel and often a tall wall of wax on one edge. An uneven surface does something similar, because the liquid wax pools toward the lower side.
4. Short, Rushed Burns
Even a candle with a perfect first burn can start to tunnel if it's only ever lit for fifteen or twenty minutes at a time. Every short burn melts a little less than the full width, and over weeks, those small shortcuts add up to a narrow well. Lighting a candle for a quick moment is lovely, but if that's your habit, a smaller candle (or a tealight) will suit you better than a big jar.
The First Burn Rule (and Why It Matters Most)

Here is the one rule that prevents most tunneling: on the first burn, let the melt pool reach the edges of the jar before you put the candle out.
The rule of thumb is about one hour of burning for every 2.5 cm (1 inch) of the candle's diameter. A typical 7.5 cm (3 inch) jar needs about three hours the first time. That's longer than most people expect, which is exactly why so many candles tunnel.
A few practical tips to make the first burn easy:
- Plan it for an evening at home. Light a new candle when you know you'll be in the same room for a few hours, like a slow evening with tea, a movie or a long phone call.
- Measure once. Hold a ruler or tape measure across the top of the jar. Write the first burn time on a little sticky note on the lid if it helps you remember.
- Watch the edges, not the clock. The time is a guide. The real sign is a fully liquid surface from glass to glass, usually about 0.5–1 cm (a quarter to half an inch) deep.
- Never push past four hours. If the pool still hasn't reached the edges after four hours, put the candle out anyway and use the foil method next time.
The first burn also applies to candles that have been sitting in a drawer for months. If an older candle has a slightly uneven surface, give it one full, patient burn and it often resets itself.
If you want a candle that's easier to get right, I'd choose a cream soy candle in a glass jar with a medium width (roughly 7–9 cm across) and a cotton wick that's centered. Soy wax melts at a lower temperature than paraffin, so it's forgiving, though it still needs that full first burn. If you'd like to understand how wick size and jar width work together, my guide to candle making for beginners explains it in a way that also makes you a smarter shopper.
Candle Burn Time Table by Jar Size

This is the table I'd keep in mind every time a new candle comes home. Measure across the top of the wax (not the outside of a thick jar) and find the closest row. Screenshot it if that's easier than remembering.
| Jar diameter | First burn (about) | Later burns | Maximum per burn |
|---|---|---|---|
| 5 cm (2 in) | 2 hours | 1.5–2 hours, until the pool reaches the glass | 4 hours |
| 6.5 cm (2.5 in) | 2.5 hours | 2–2.5 hours | 4 hours |
| 7.5 cm (3 in) | 3 hours | 2.5–3 hours | 4 hours |
| 9 cm (3.5 in) | 3.5 hours | 3–3.5 hours | 4 hours |
| 10 cm (4 in) | 4 hours | 3.5–4 hours | 4 hours |
| Over 10 cm, multi-wick | 2–4 hours, until all the small pools join | 2–3 hours | 4 hours |
Two notes on the table. First, "later burns" just means you should still aim for edge-to-edge melting every time, not only on day one. It usually happens a little faster once the surface is level. Second, a wide single-wick candle that can't melt to the edges within four hours isn't going to get there with more time. That's a job for the foil collar further down.
Small candles under 5 cm, like votives and tealights, don't follow this table. They're designed to melt fully on their own, so just place them in a holder and enjoy them.
How To Prevent Candle Tunneling Every Time: 6 Habits
Once the first burn is done well, these six habits keep the surface flat and even until the very last centimeter.
1. Trim the Wick Before Every Light

A long wick makes a tall, flickering flame that smokes, mushrooms at the tip and burns unevenly. A wick that's too short drowns. The sweet spot is about 5–6 mm (a quarter inch) above the wax, trimmed every time before you light it, including the very first time.
- Trim only when the wax is cool and solid, never while it's liquid.
- Remove any black "mushroom" tip and any bits that fall into the jar, because debris in the wax can act like a second wick.
- If the wick has leaned to one side, gently straighten it toward the center right after you put the candle out, while the wax is still soft (careful, it's warm).
Nail scissors can't reach deep into a jar, which is why a proper trimmer helps. Look for a gold wick trimmer with an angled head and a little flat base that catches the clipped end so it doesn't drop into the wax.
2. Let the Melt Pool Reach the Edges
The first burn rule doesn't retire after night one. Every time you light the candle, try to keep it lit until the liquid wax touches the glass all the way around. If you only have twenty minutes, light a smaller candle that night and save the big jar for a slower evening.
A simple habit that helps: light your favorite candle at the start of an evening routine (dinner, a bath, your tea and journaling time) rather than at the end, when you'll want to blow it out soon.
3. Keep It Away From Drafts
Before you light a candle, notice the air around it. Is it near an open window, an air vent, a fan or a doorway people walk through often? Move it somewhere still. A steady flame stands straight and melts the wax evenly; a dancing flame melts one side and leaves the other.
If your flame keeps leaning even in a quiet spot, check that the wick is centered and that nothing in the room (a heater, a fan on another setting) is moving the air.
4. Burn on a Level, Heat-Safe Surface

A level surface keeps the melt pool even, and a heat-safe one protects your furniture from the warm base of the jar. Glass jars get hot, especially near the end of a candle's life, so I like the idea of every candle having its own small "home base."
A pick for this is a cream ceramic candle tray or a small stone coaster with a flat, stable base that's wider than the jar. It also catches drips, keeps the lighter and trimmer in one spot, and makes the whole corner look intentional. For more ideas on placing and grouping candles beautifully, my guide on how to style candles at home has fifteen of them.
5. Never Burn Longer Than 4 Hours
It sounds like a contradiction: burn long enough, but not too long. After about four hours, the wick tends to mushroom, carbon builds up, the flame grows taller and the jar gets very hot. A candle burned for six or eight hours straight can also overheat, which isn't safe and can crack the glass.
If you want candlelight all evening, burn one candle for up to four hours, put it out, and light a second one.
6. Let It Cool Completely Before Relighting
After you put a candle out, give it at least two hours to cool and set before you light it again. Relighting warm, soft wax gives you a wobbly surface and a flame that sinks into the soft center. A fully solid, level surface is the best starting point for an even burn.
How To Fix a Tunneled Candle With Aluminum Foil
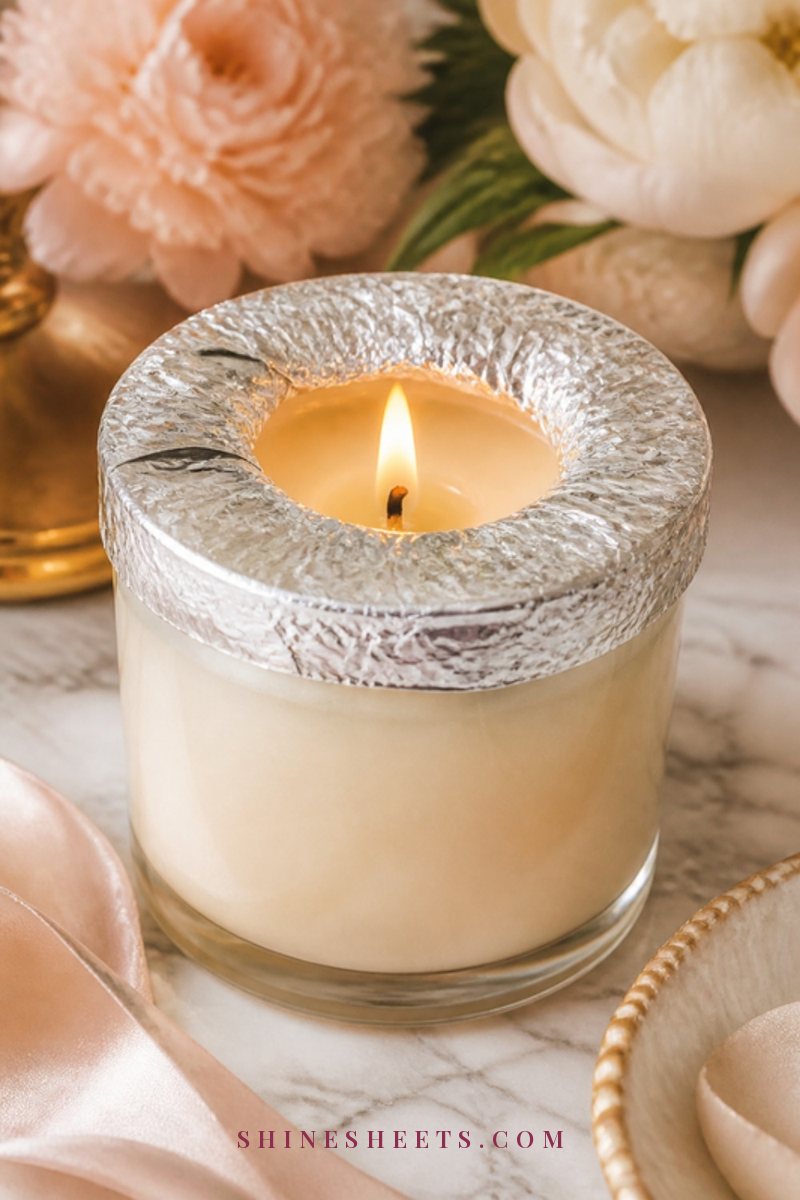
If you already have a candle with a deep tunnel, don't throw it away. The foil collar method is the gentlest, easiest fix, and it works well for jar candles with a ring of wax up to about 1–2 cm thick. It reflects the heat back toward the edges so the walls of wax melt down and level out.
Here's how to do it, step by step:
- Trim the wick. Cut it to about 5–6 mm. If the wick is buried deep in the tunnel, carefully scrape a little wax away from around it with a spoon once the wax is fully cool.
- Tear a piece of aluminum foil. It should be long enough to wrap all the way around the top of the jar with some overlap.
- Wrap the foil around the outside of the jar. Let it extend about 2–3 cm above the rim.
- Fold the top edge inward. Press it gently over the top of the jar, so the foil covers the unmelted ring of wax but leaves a circle open in the middle, roughly 2.5–5 cm (1–2 inches) wide, so the flame has air.
- Light the wick carefully. A long lighter makes this much easier and keeps your fingers away from the foil.
- Burn and check every 20–30 minutes. Stay in the room the whole time. You'll see the wax walls under the foil slowly soften and melt down toward the center.
- Remove the foil once the surface is even. This usually takes one to three hours. Use an oven mitt or tongs, because the foil gets hot. Let the candle keep burning for a few more minutes if the pool isn't quite at the edges yet, then put it out and let it cool fully.
For lighting into a deep jar or through a foil collar, I'd choose a long candle lighter in white with a slim neck. It reaches the wick without tipping the jar or bringing your hand near the flame.
A couple of honest notes: the jar will feel hotter than usual during this fix, so keep it on a heat-safe tray, and don't try to speed things up with a hair dryer or a heat gun near a lit candle. I'd also skip the oven methods you'll find online. Heating a glass jar in an oven can crack it, and it's simply not worth the risk for a candle.
When a Candle Can't Be Saved
Some candles are beyond the foil trick. If the wick is completely buried, has burned down to a tiny stub or keeps drowning in the pool, the candle has done what it can. Let it cool, then scoop out the remaining wax and melt the pieces in a wax warmer, or reuse the empty glass as a pen cup, a little planter or a vanity jar. My guide on how to remove candle wax covers getting old wax out of glass cleanly, plus what to do if wax has dripped onto fabric or wood.
How To Make Candles Last Longer: 5 Small Habits
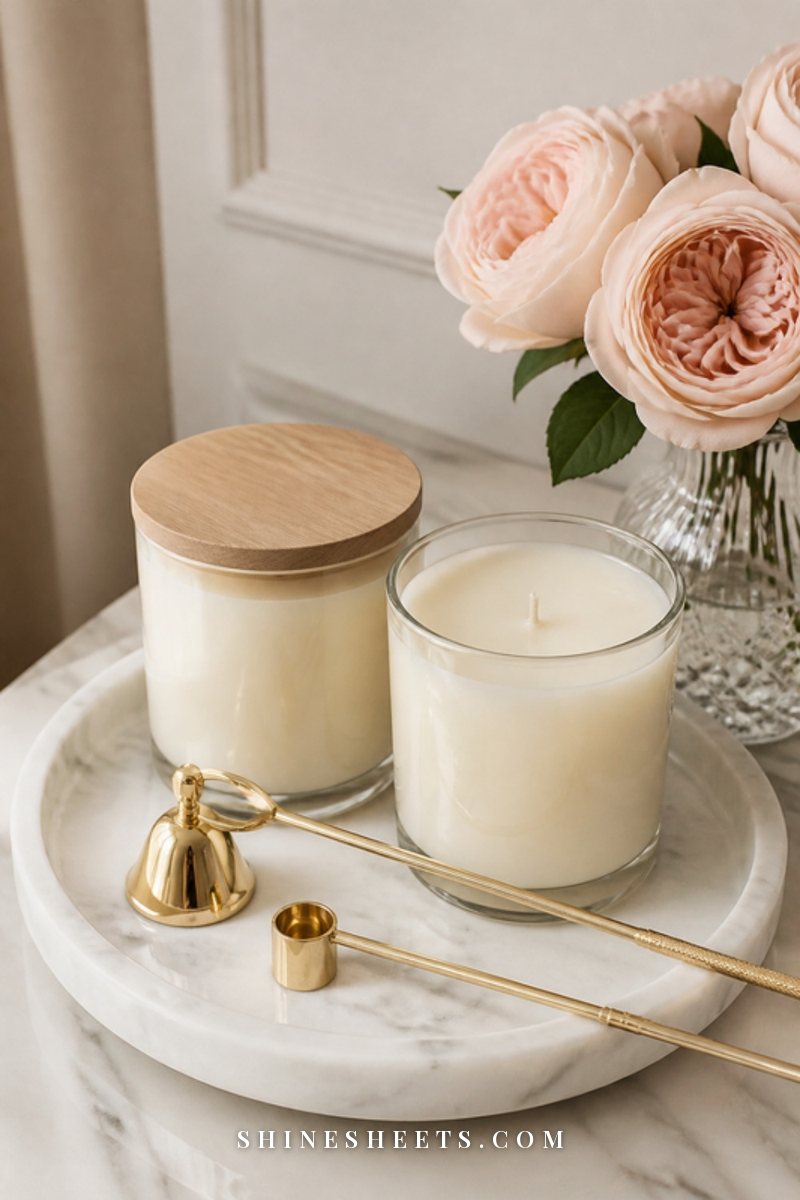
Preventing tunneling is the biggest step toward making a candle last, but a few more habits stretch every jar even further.
- Put the lid on when it's not in use. Once the wax has cooled, a lid keeps out dust and stops the fragrance from slowly fading into the air. Dust on the surface can also catch and create an uneven flame.
- Use a snuffer or a wick dipper instead of blowing. Blowing can splash hot wax, push the wick off-center and send up a puff of smoke. A snuffer gently cuts off the oxygen. A wick dipper lets you bend the lit wick into the melted wax and straighten it back up, which puts the flame out with no smoke and coats the wick in wax, ready for a clean relight. A gold snuffer and wick dipper set is a lovely pick that looks pretty left out on the tray.
- Stop when about 1 cm of wax remains. When there's roughly 1 cm (half an inch) of wax left at the bottom, it's time to retire the candle. Below that, the glass can overheat and the wick's metal base can heat the surface underneath. This is a safety habit as much as a longevity one.
- Store candles somewhere cool and dark. Heat and direct sun can soften wax, fade the color and weaken the scent before you've even lit the candle. A closet shelf or drawer is perfect.
- Rotate a few candles. Instead of burning one candle every single day for short bursts, keep two or three and choose the one that matches how much time you have: a small one for twenty minutes, the big jar for a long evening.
A candle that melts evenly also scents a room more effectively, so you can often burn it for less time and still enjoy the fragrance. If a fresh-smelling home is the goal, my tips for keeping your apartment smelling fresh pair beautifully with good candle habits.
Candle Safety Basics (Please Don't Skip These)

None of the tunneling tricks above matter if a candle isn't used safely. These are the habits I'd treat as non-negotiable, every single time:
- Never leave a burning candle unattended. Put it out before you leave the room, go to sleep or step out "for a minute."
- Keep at least 30 cm (12 inches) of space around the flame. Stay clear of curtains, blankets, books, dried flowers, garlands and anything else that can catch.
- Keep candles away from pets and kids. Place them high enough and steady enough that a wagging tail or a curious hand can't knock them over.
- Use a heat-safe, stable surface. A tray or coaster on a level table, never directly on a windowsill, bed, sofa arm or bookshelf.
- Don't move a candle while the wax is liquid. Hot wax can spill and burn your skin, and moving it can push the wick off-center. Wait until it has fully set.
- Don't burn a candle with a flame that's too big. If the flame is tall, flickering or smoking, put it out, let it cool, trim the wick and relight.
The National Fire Protection Association has a clear, helpful page on candle fire safety if you'd like the full list. And if candles make you a little nervous to leave burning, that's a completely valid feeling. Battery candles with a warm white glow give you the same soft light with zero risk in a bedroom or a child's room.
Final Thoughts
Candle tunneling feels like one of those small household annoyances you just have to live with, but it really comes down to a few simple habits: a full first burn, a trimmed wick, a still spot and never more than four hours at a time. Do those, and your candles will melt flat, smell stronger and last noticeably longer.
The next time a new candle comes home, give it a slow evening, a level tray and a little patience. It will repay you with weeks of even, beautiful light, and a jar that burns all the way down the way it was meant to. If you're in the mood for more warm touches around your home, my list of renter-friendly ideas for a cozy home is a lovely next read.